

Cocktail Party Planning Made Easy: Your Guide to Stress-Free Entertaining at Home
Hosting friends and family should be fun, not stressful. Yet somehow the idea of throwing a party can send even the most organized person into a panic. What should you serve? How much alcohol do you need? Will there be enough food? Will guests have a good time?
The good news is that entertaining doesn’t have to be complicated. Some of the best gatherings happen when good drinks, simple food, and great conversation come together. You don’t need fancy decorations, a fully stocked bar, or professional hosting experience to create a memorable evening.
Over the years, I’ve learned that every successful gathering comes down to a few basic elements. Once you have a simple plan in place, you’ll spend less time worrying about details and more time enjoying your guests. Whether you’re hosting your first happy hour or planning a backyard cocktail party, this guide will help you entertain with confidence.
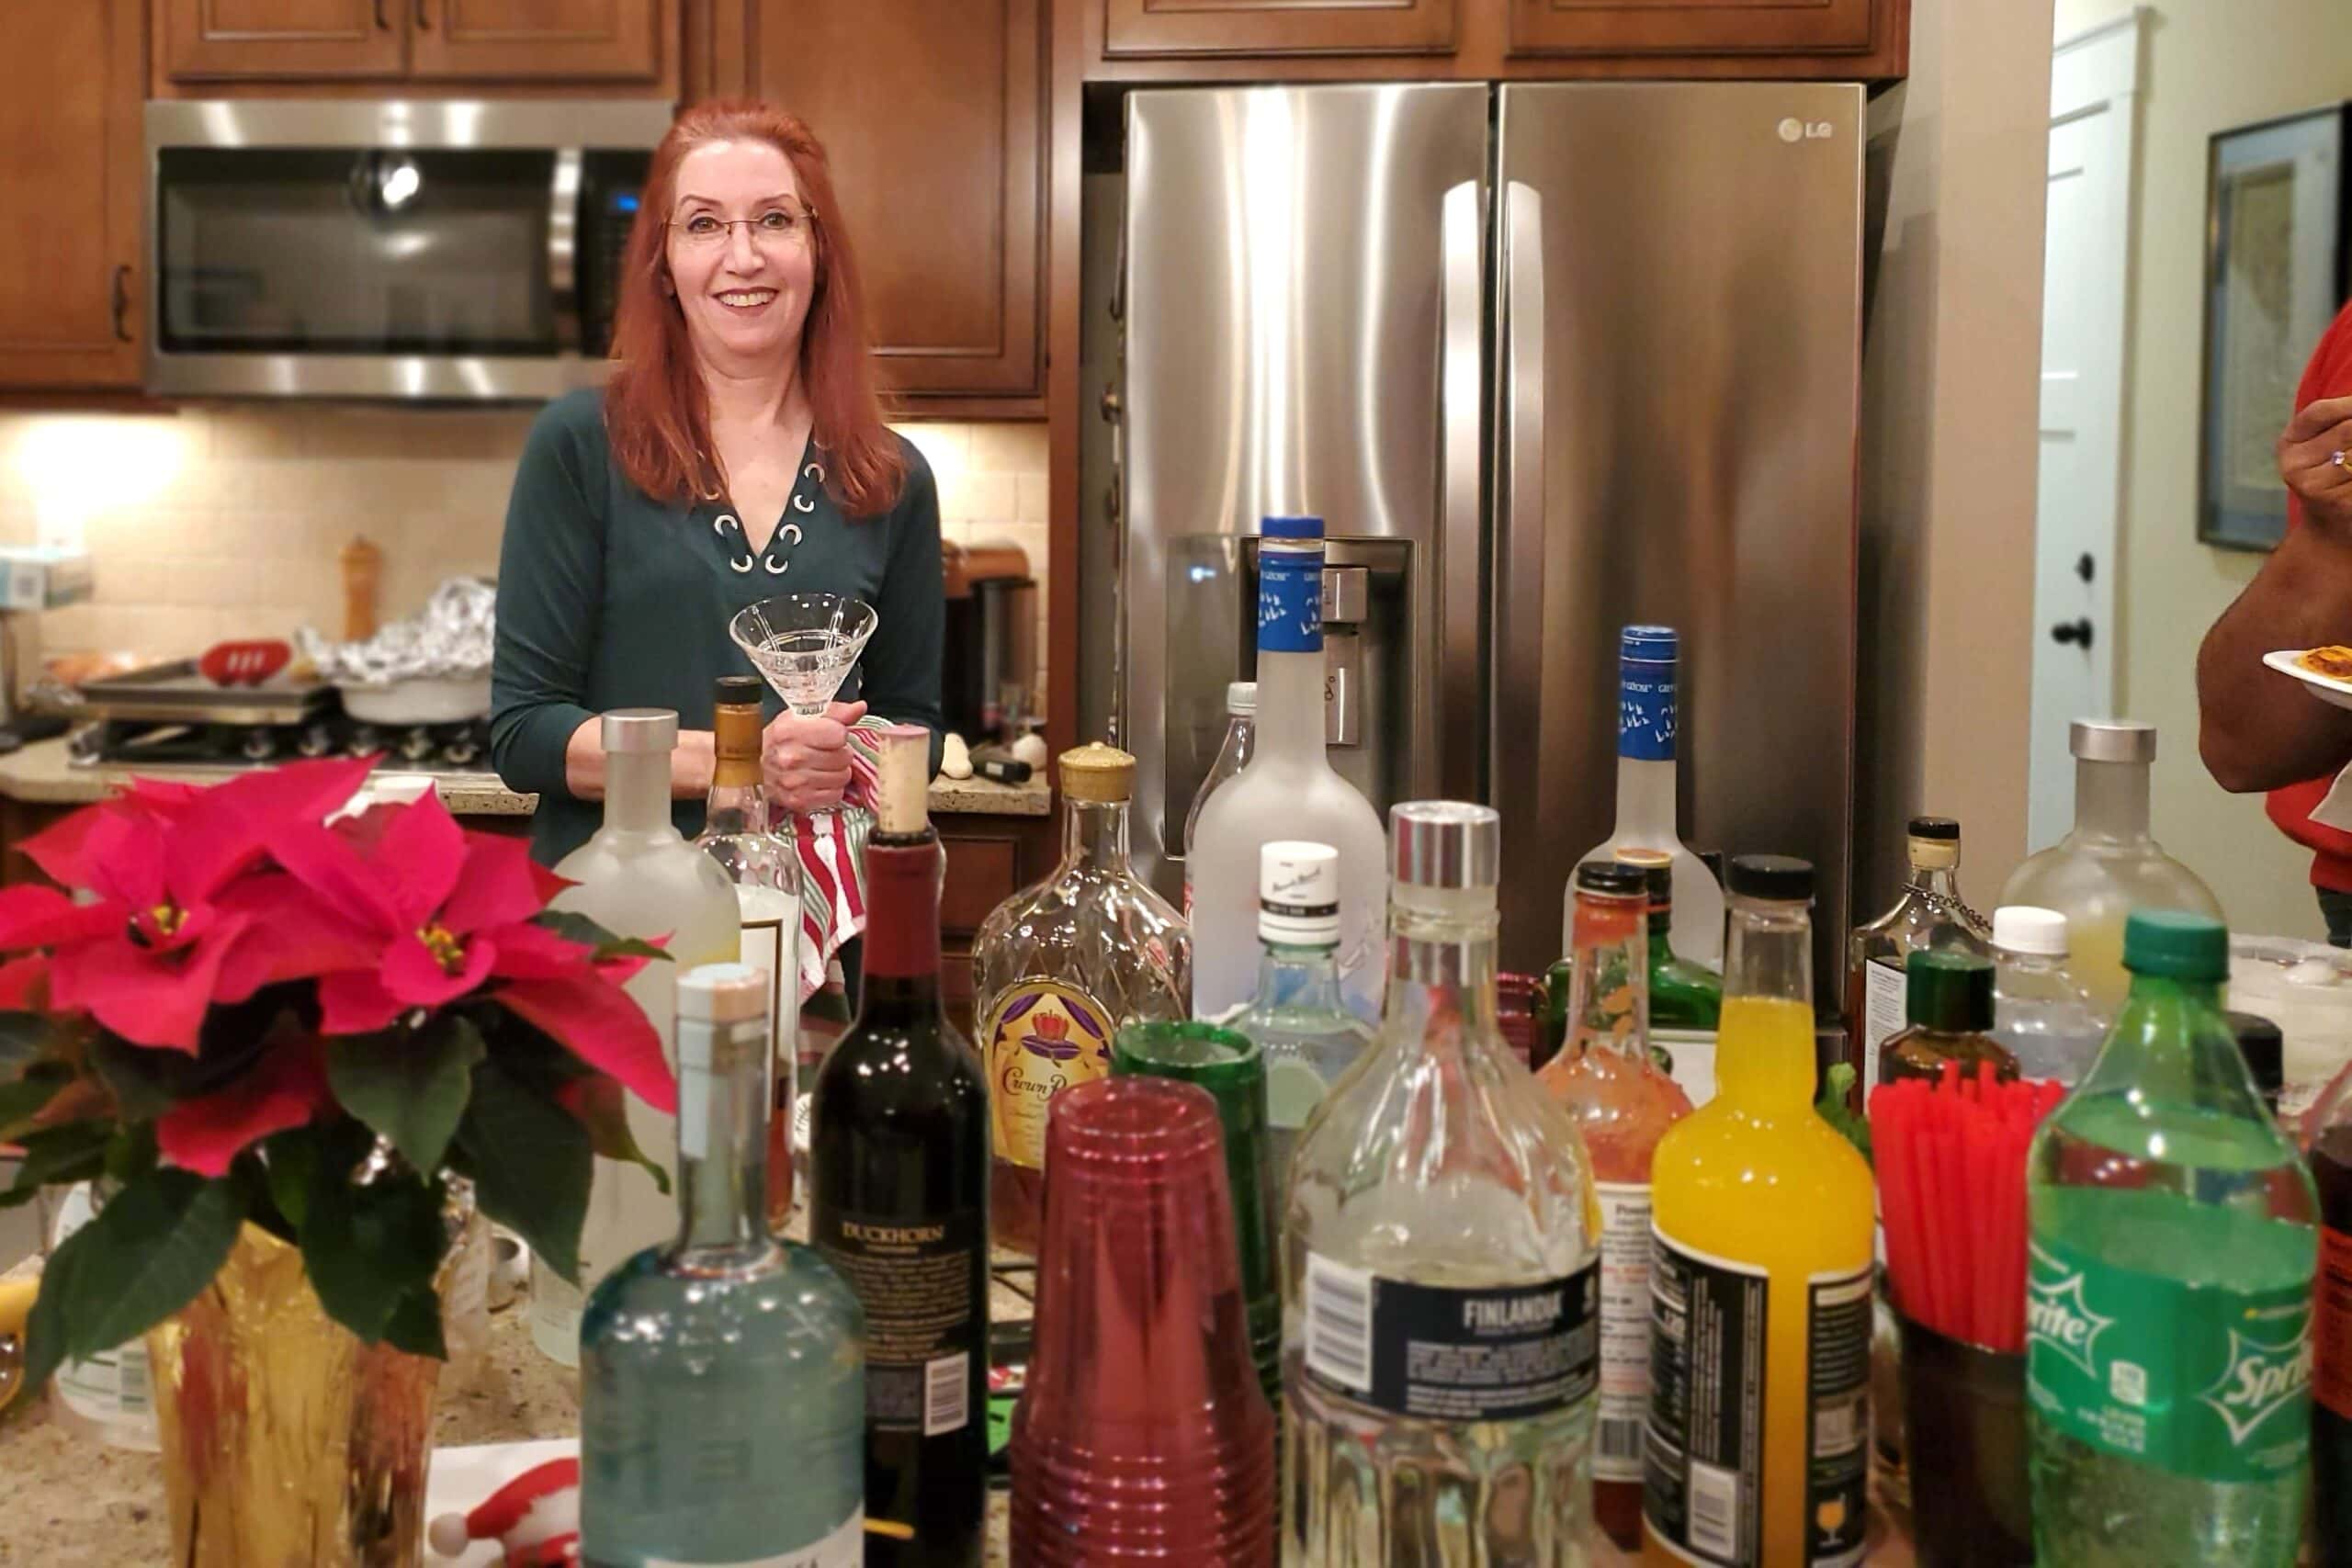
The Four Essentials of a Great Cocktail Party
Every successful gathering can be broken down into four simple pieces:
- Drinks
- Food
- Atmosphere
- Preparation
Focus on these four areas, and you’re already halfway to hosting a party your guests will remember.
My Two-List Cocktail Party Planning Trick
When I’m planning a cocktail party, I always make two lists: one for Food & Drinks and one for Party To-Do’s. These two simple lists keep me organized and help make party planning feel much less overwhelming. I keep them handy throughout the planning process so I can add things as I remember them and cross items off as they’re finished. There’s nothing quite like seeing that list get shorter as the party gets closer!
I start my Food & Drink list about three months before the party. You’d be surprised how much you can buy in advance. Liquor, crackers, mixers, garnishes, shelf-stable ingredients, and even some of the ingredients for your make-ahead party dishes can be purchased weeks ahead of time. I pick up a few things each week instead of trying to buy everything in one big shopping trip.
This is one of my favorite cocktail party planning tips because it takes the “sting” out of the party cost. Rather than spending a small fortune all at once, you spread the expense over several months. By the time party day rolls around, much of the food and drinks are already checked off your list—and you can concentrate on the fun stuff!
My Party To-Do list is where I keep track of all those little details that are easy to forget. Pull out the serving pieces, select the glasses, set up the bar, clean the bathrooms, check the ice situation, and anything else that needs to happen before guests arrive. I add to the list whenever something pops into my head, and then cross it off when it’s done. It’s simple, it keeps me organized, and it helps me actually enjoy my own party!
The Drinks
let’s start with the most important part of any cocktail party
As much as I love a beautiful appetizer spread, guests usually make a beeline for the bar first. That’s why I always start my party planning with the drink menu. Knowing what you’re serving makes it much easier to figure out how much liquor, beer, wine, mixers, ice, and garnishes you’ll need.
My favorite approach is to offer a few liquor options instead of limiting guests to a single signature cocktail. A well-stocked cocktail party doesn’t have to mean stocking every bottle in the liquor store. A few versatile spirits, a selection of mixers, plus beer and wine will give your guests plenty of choices without breaking your budget.
- Vodka
- Tequila
- Bourbon
- Rum
- Gin
- Beer
- Wine
The drink list above is designed to work for most cocktail parties, but don’t feel like you have to follow it exactly. One of the advantages of hosting friends and family is that you probably already know what they like to drink. Use that knowledge to customize your shopping list and avoid spending money on bottles that will sit untouched all night.
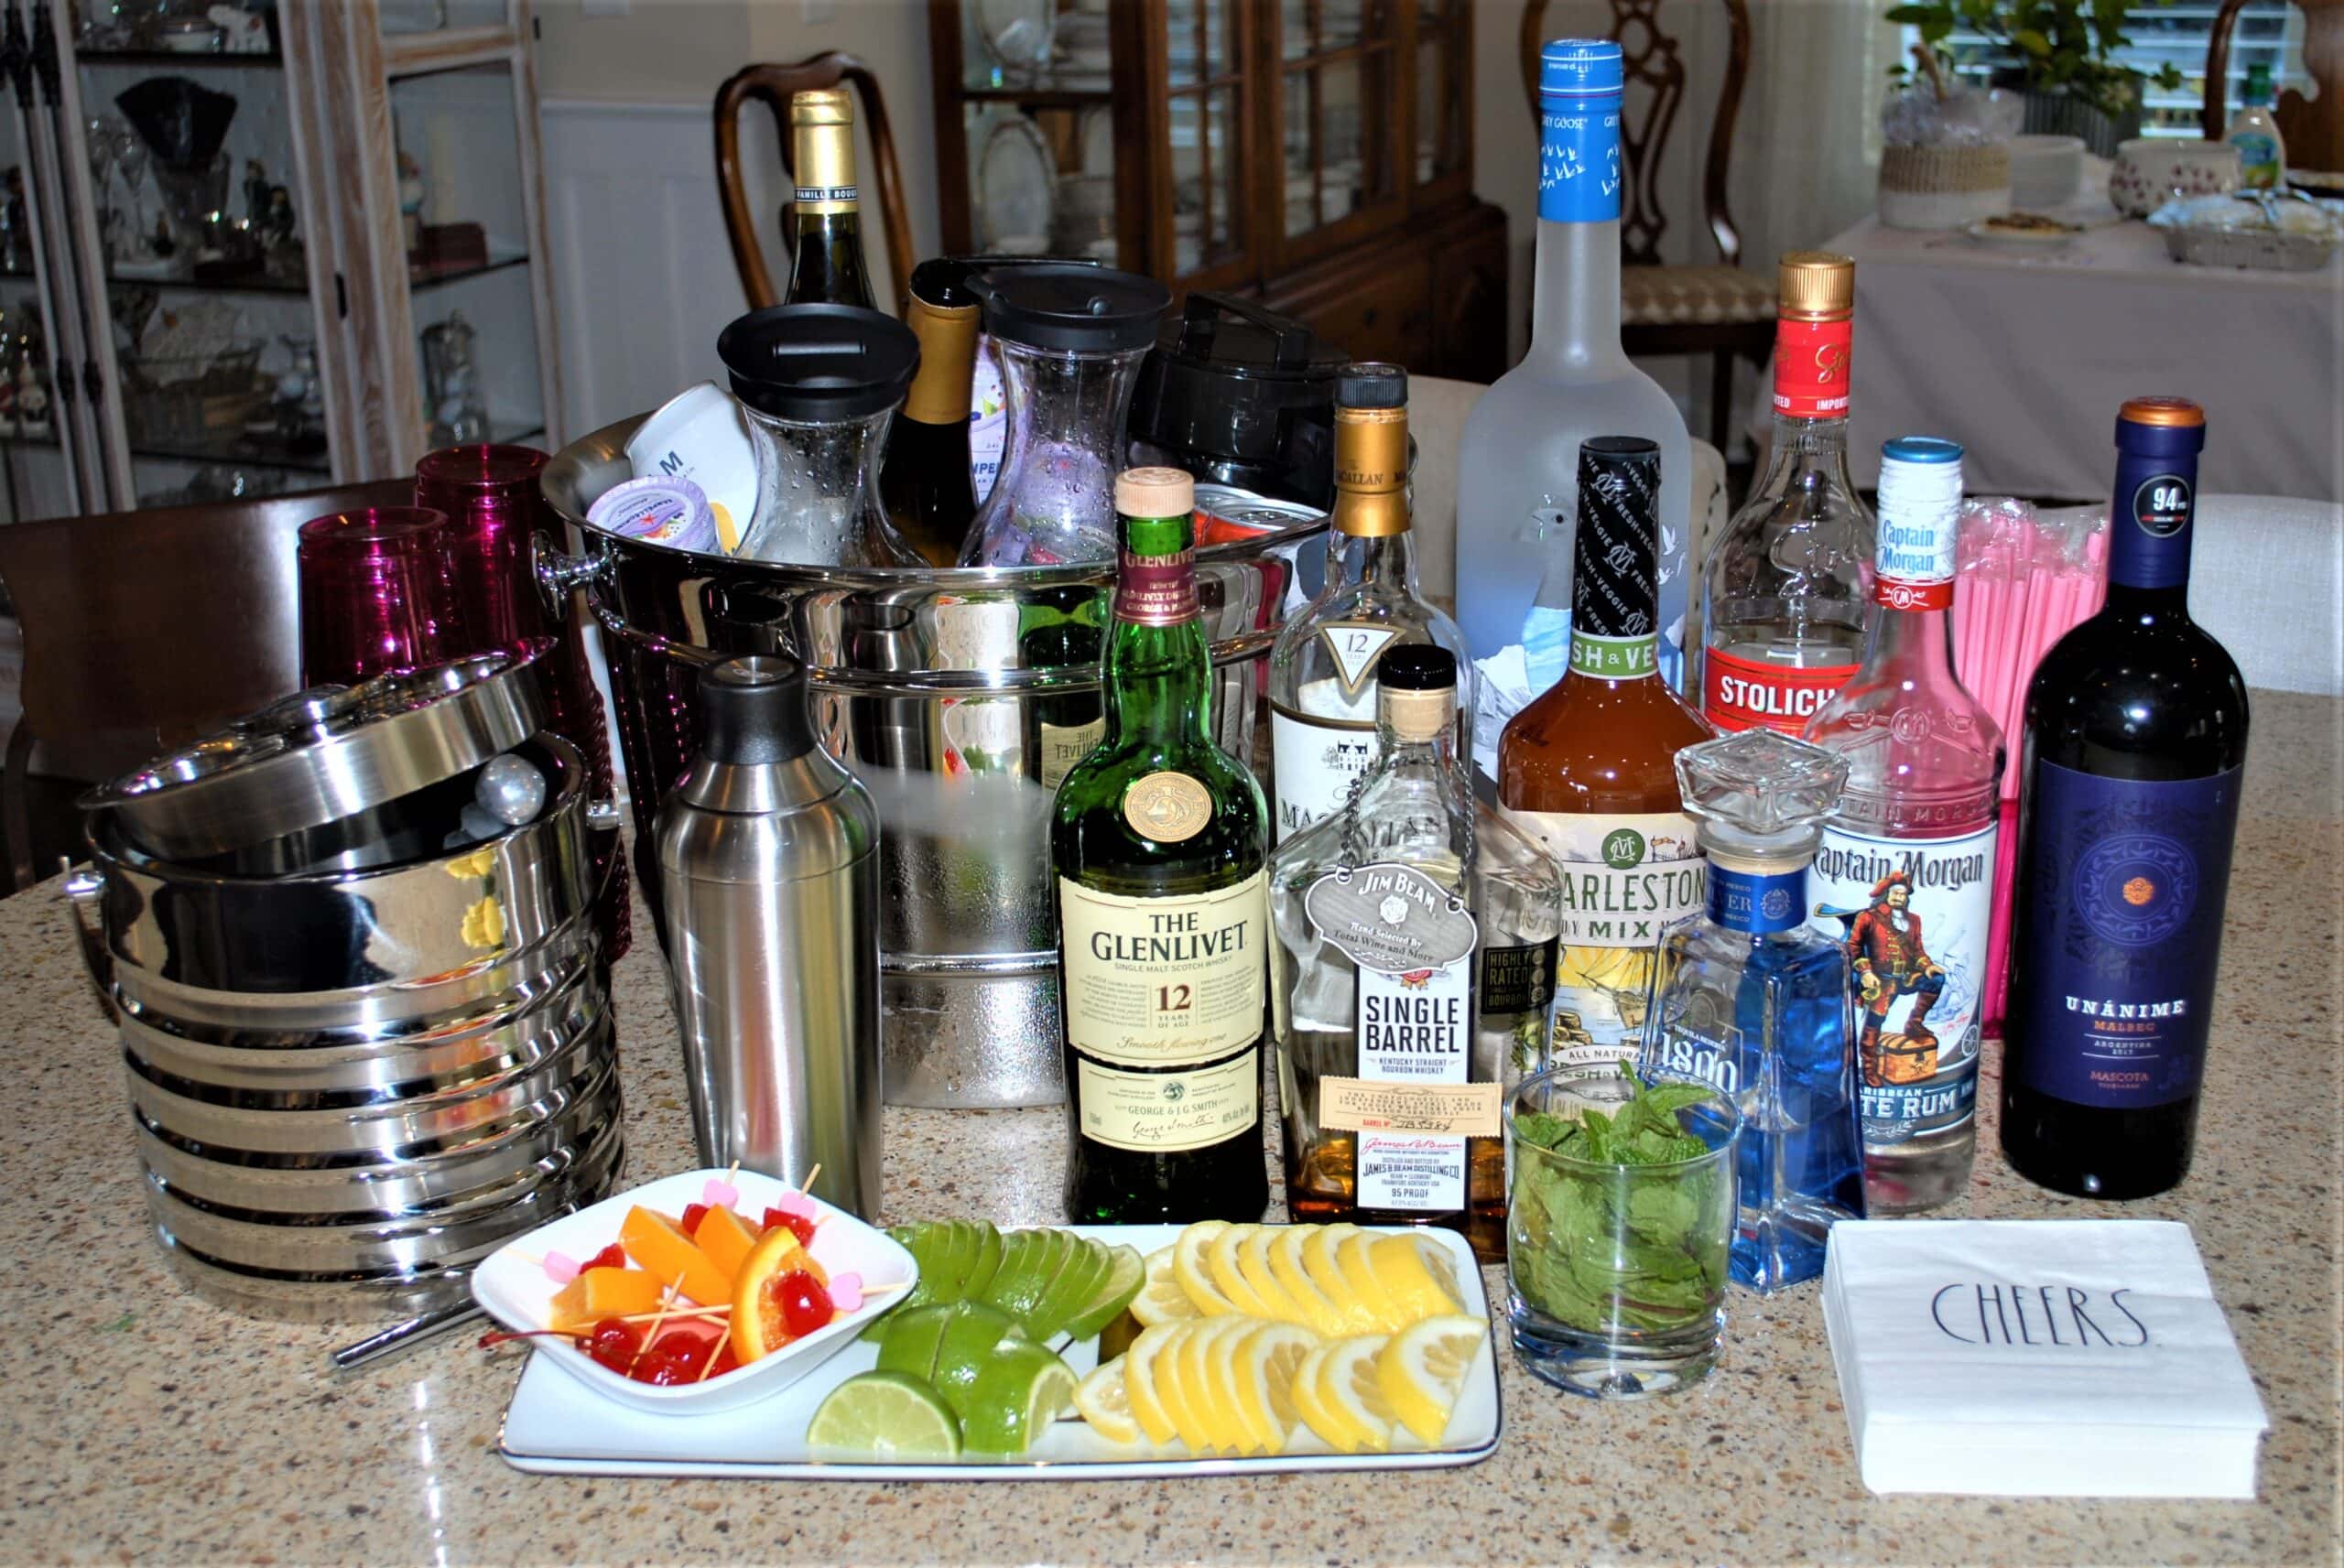
For example, if your group is full of white wine and prosecco drinkers, there’s no reason to buy red wine just because it’s on a standard party checklist. Swap that bottle of red for an extra bottle of white wine or prosecco instead.
The same goes for beer, liquor, mixers, and even non-alcoholic drinks. If your friends love margaritas, stock up on tequila. If they’re bourbon fans, make sure you have enough on hand for an Old Fashioned or Whiskey Sour. The goal isn’t to offer every possible drink option—it’s to have enough of the drinks your guests will actually enjoy.
A little personalization makes your shopping list more accurate, reduces waste, and helps ensure you don’t run out of the crowd favorites before the party is over.
Coming Soon – Liquor Calculator
Not sure how many bottles to buy? That’s exactly why I created my Liquor Calculator. Simply enter your guest count and party length, and it will help estimate how much liquor, beer, wine, and mixers you’ll need so you can shop with confidence and avoid running out halfway through the party.
Must-Have Cocktail Garnishes
- Lime wedges
- Lemon slices
- Maraschino cherries
- Fresh mint
- Orange and cherry wheels
- Cocktail salt and sugar

If you’ve spent any time on my site, you already know I’m the queen of preparing as much as possible ahead of time. But when it comes to fresh fruit garnishes, this is one task I save for the day of the party. No one wants a dried-out lime wedge, a slimy lemon slice, or an orange wheel that’s seen better days.
Fresh garnishes make cocktails look polished and inviting, and they only take a few minutes to prep. I usually slice my lemons, limes, and oranges a few hours before guests arrive, then store them in an airtight container in the refrigerator until it’s time to serve. It’s a small detail, but fresh garnishes can make even the simplest cocktail feel like something special.
👉 Need help preparing your garnishes? → Cocktails for Beginners: Easy Drinks Anyone Can Make at Home
Pre-Make Your Signature Cocktails
One of my favorite cocktail party hosting tricks is to make a themed or signature cocktail the night before the party. Not only does it save time when guests arrive, but it also keeps me from playing bartender all evening instead of enjoying the fun.

I simply mix the cocktail ingredients the night before and store everything in a tightly sealed plastic carafe in the refrigerator. This works especially well for martinis, shooters, and other shaken cocktails that don’t contain sparkling ingredients.
Past Holiday Party Pre-Made Martini Specials


Before guests arrive, I place the plastic carafes in the ice tub. Here’s the step that makes serving easier and much less messy. When a guest decides they’d like to try the signature cocktail, I give the sealed carafe a good shake to remix all the ingredients. Trust me, it’s much easier to shake a large batch in a well-sealed container than to risk cocktail mix splashing across your bar because the lid wasn’t as secure as you thought.
For a cocktail served on the rocks, simply fill a glass with ice and pour in your pre-made mix. For a martini, I pour a portion of the pre-mixed cocktail into a cocktail shaker that’s about halfway full of ice. Even though the drink is already mixed and cold, a martini still deserves a proper shake over ice. This final shake chills the martini beautifully, adds the perfect amount of dilution, and creates that smooth, icy-cold finish that makes a martini feel special. A few seconds of shaking is all it takes before straining it into a chilled martini glass.
Using this simple make-ahead method lets me serve cocktails quickly, keeps the bar area neat, and gives me more time to spend with my guests. If you’re hosting a crowd, a quality sealed carafe and a reliable cocktail shaker are two of the hardest-working tools in your entertaining collection.

Hosting a small gathering or want a no-fuss bar setup?
Skip the full bar and offer:
- One or two signature cocktails
- Beer
- White wine
- Red wine
- Prosecco
- Non-alcoholic options like soda, San Pellegrino Ciao sparkling water, juice
- Bottled Water
One of the biggest advantages of this simple setup is that it keeps your garnish list short and your prep work easy. Instead of slicing oranges, lemons, limes and every other garnish imaginable, you’ll only need garnishes for your signature cocktail and a few extras for beer, if needed. For example, if you’re serving Corona, a bowl of lime wedges is all you need. Less prep, less waste, and fewer items to buy.
Keep It Simple: A Wine Bar
For a wine-only bar, there’s no need to set up near the kitchen sink. Choose a convenient spot with enough room for your wine glasses, cocktail napkins, a wine tub filled with ice, and your wine bottles.
Start by setting out the wine glasses and cocktail napkins. Place white wine, prosecco, and champagne in the wine tub on ice, while red wine can be served at room temperature. Remember to chill your white wine, prosecco, and champagne in the refrigerator the night before.
Just before guests arrive, open a couple of bottles of each type of wine you’re serving. Keep the wine opener handy throughout the party so guests can easily open another bottle when needed.
Wine Selection Tip: Keep your wine selection simple by choosing a few crowd-pleasing varieties. For white wine, Chardonnay, Sauvignon Blanc, and Pinot Grigio are popular choices. For red wine, Pinot Noir, Merlot, and Cabernet Sauvignon are reliable favorites. You don’t need to offer every variety—two or three options in each category are plenty for a party.

The Food
party food for mingling, grazing, and standing around the kitchen island with a drink in hand
When it comes to food for a cocktail party, I want to set one expectation right away—I’m not usually hosting a dinner party. With the exception of Christmas, I’m typically planning party food for mingling, grazing, and standing around the kitchen island with a drink in hand. So everything here is focused on cocktail-style food, not a sit-down, multi-course meal.
You’ll see examples from a team gathering, a smaller birthday party for 15 guests and my larger annual holiday party for around 40 people. And I’m very realistic about how I put it all together. Sometimes I cook, sometimes I lean on grocery store platters and catering sections, and yes—sometimes I absolutely pick up ready-made items from a local restaurant and call it part of the plan. If it helps, I can even break down exactly what I make versus what I buy so you can decide where to spend your time and where to save it.
As a general rule of thumb, I like to think about cocktail party food in two different ways—so you can choose whichever approach feels easiest for you.
How Much Food Do You Need?
By quantity (per person):
- 6–8 pieces per person for a 2-hour party
- 8–12 pieces per person for a 3–4 hour party
- 12–16 pieces per person for longer gatherings or heartier appetites
Another simple way to think about it is how guests actually eat during a party. Most people will have about 3–5 bites in the first hour, then settle into 1–3 bites per hour after that. It’s steady grazing, not a full meal.
By category (my favorite planning method):
- 2–3 savory bites (cheese, meat, crostini, dips)
- 1–2 fresh or lighter options (fruit, vegetables, something bright)
- 1 hearty option (sliders, shrimp, flatbread, or something more filling)
This mix keeps things balanced so there’s always something for everyone—without you feeling like you’re running a full kitchen.
No matter which method you use, the goal is the same: plenty of variety, easy access for guests, and food that lets you enjoy the party right along with them.
The Ideal Cocktail Party Appetizer Mix – Approximately 15 People
- 1 charcuterie board
- 2 dips with crackers, chips, or bread
- 2 protein-based appetizers
- 1 vegetable-based appetizer
- 1 sweet bite-sized dessert
The setup below is from a smaller birthday party for about 15 guests, and it’s a great example of how I mix homemade and store-bought items to keep things simple but still feel abundant. I made five appetizers myself and then filled in the gaps with a few easy grocery store finds to round everything out without spending the whole day in the kitchen.
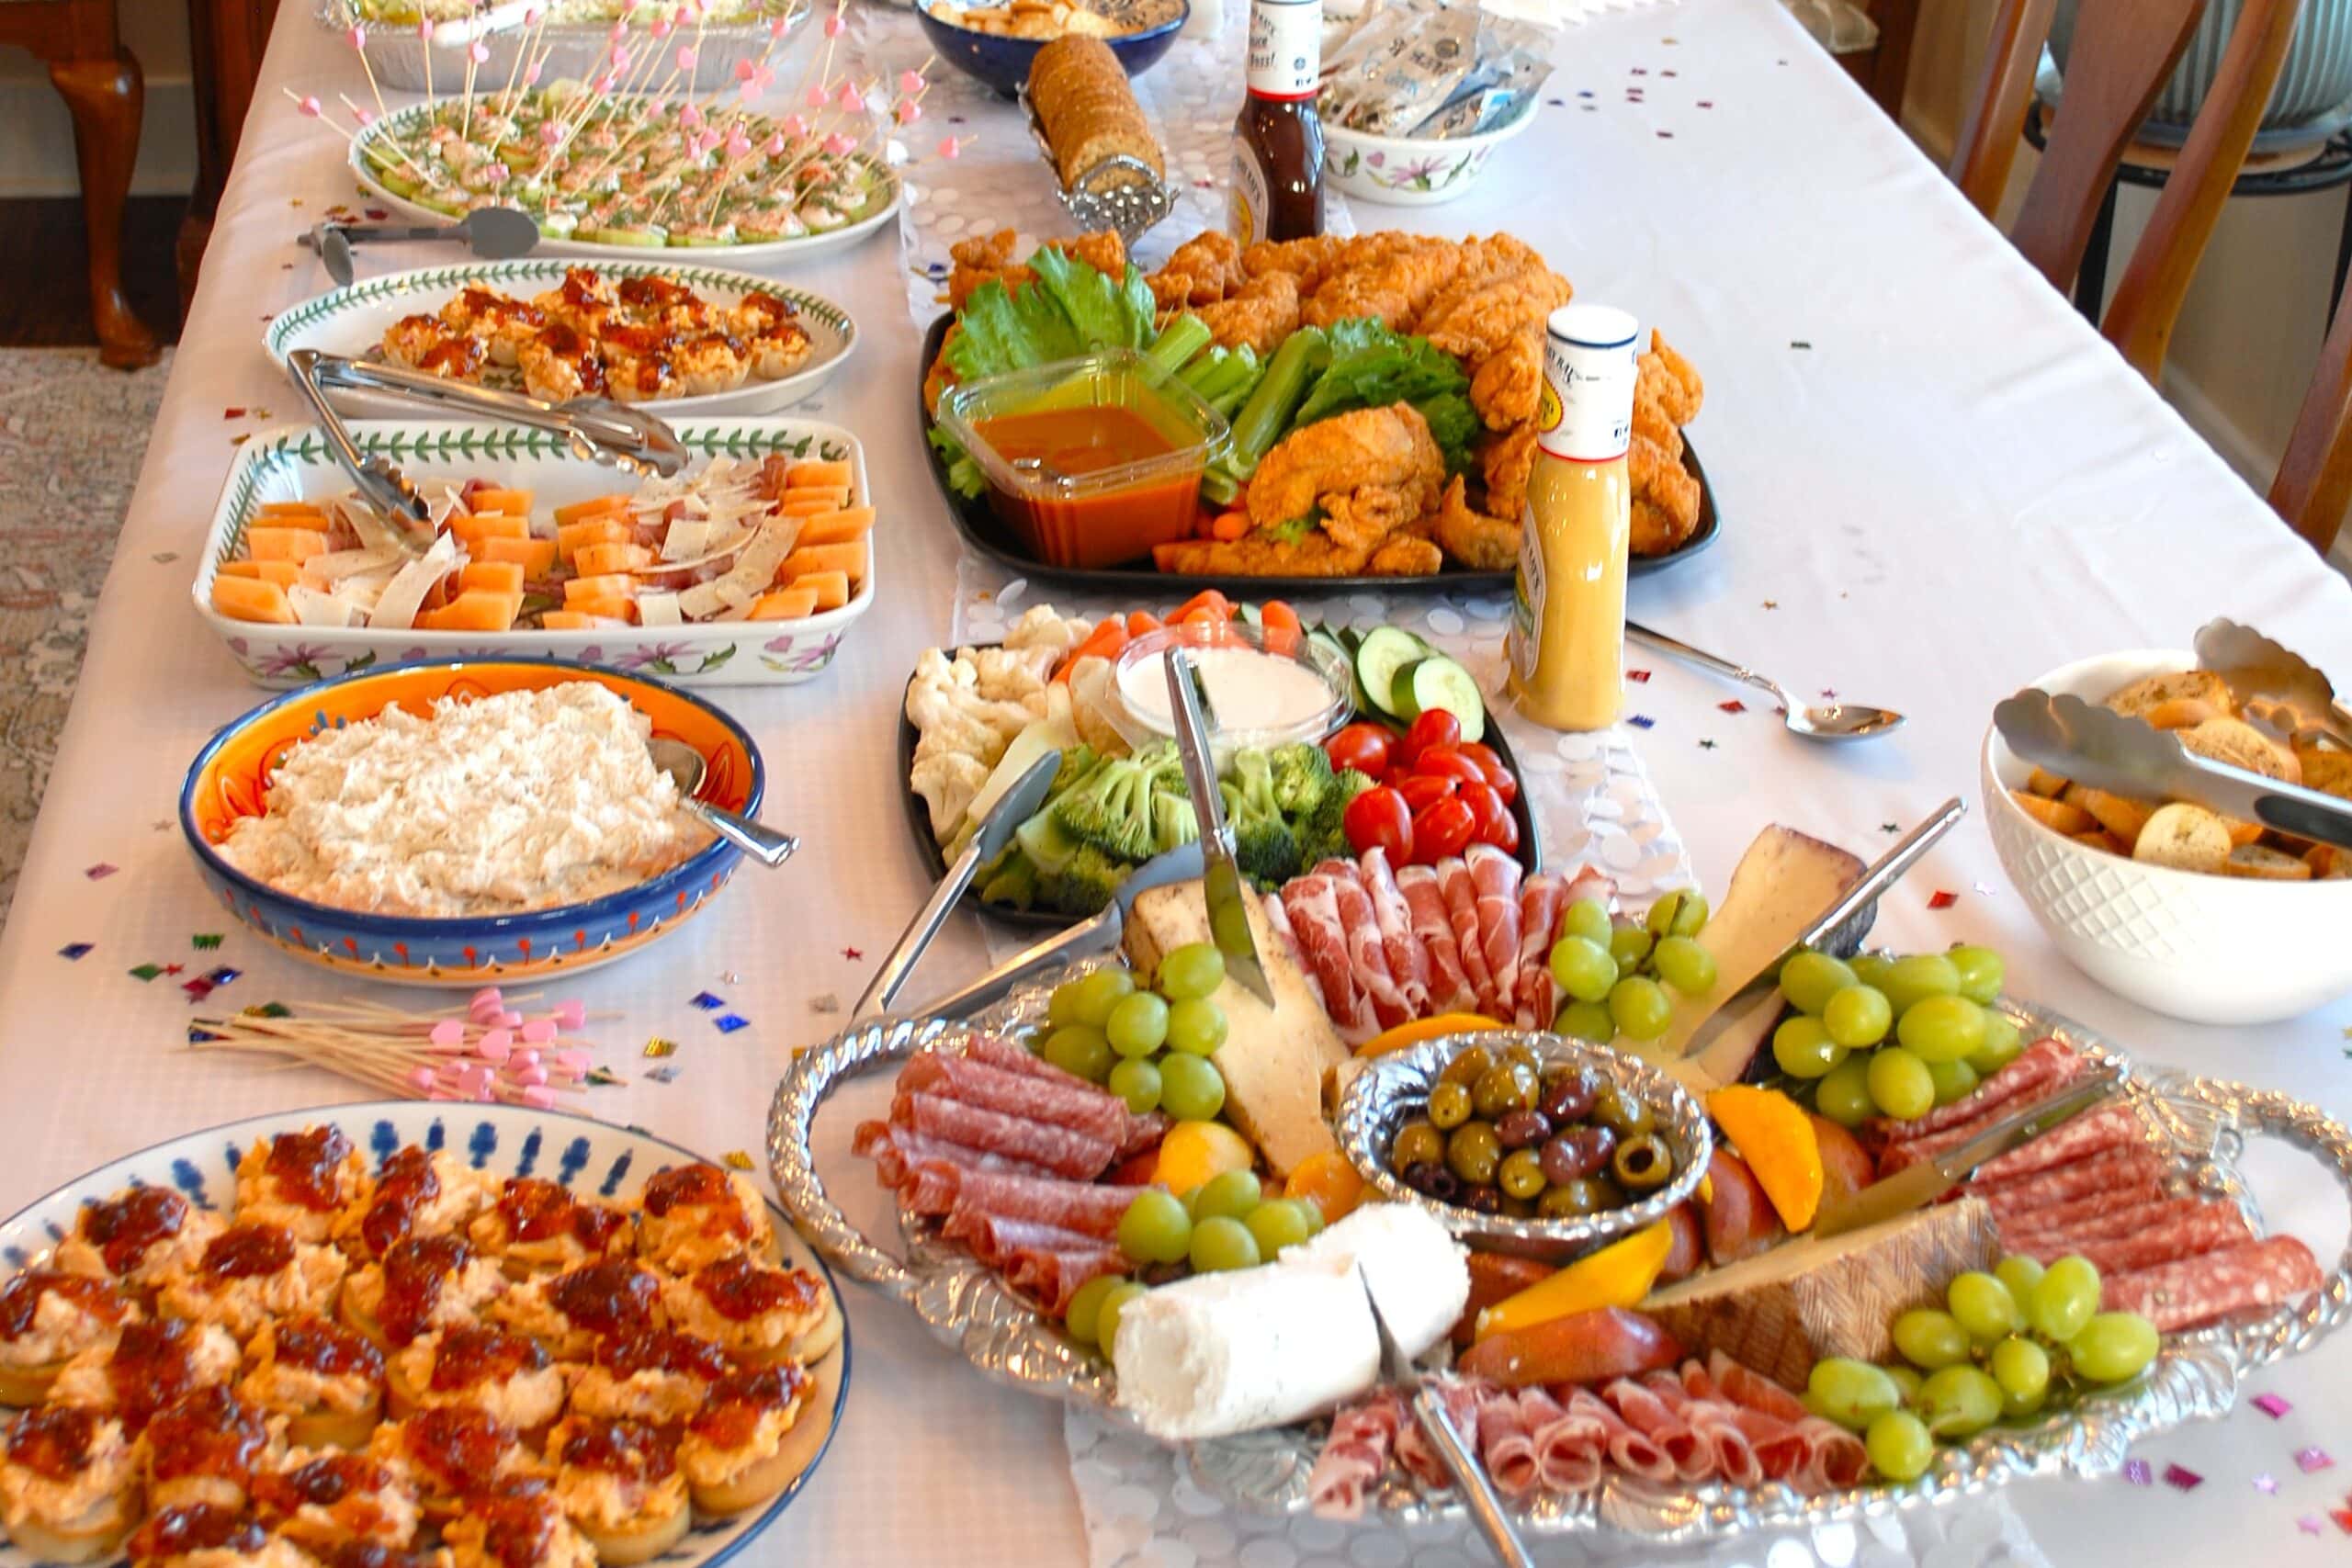
- Smoky Tzatziki Cucumbers
- Pimento Cheese Appetizer Bites
- Melon Wrapped with Prosciutto
- Crab Spread
- Charcuterie Board
- Vegetable Tray
- Chicken Strips
- Caesar Salad (not shown)
- Birthday Cake (not shown)
On the store-bought side, I picked up a vegetable tray, chicken strips, and a Caesar salad (not shown), along with a birthday cake to keep things easy and festive. When you step back, it still feels like a full, generous spread—but the reality is it was a very manageable mix of prep, planning, and smart shortcuts.
The Atmosphere
the real focus should be enjoying your guests
When it comes to atmosphere, I’ve always believed the best parties don’t require hiring entertainment or turning your home into a production. The real focus should be enjoying your guests.
I know some people suggest dim lighting, but I personally prefer being able to see everything clearly—my guests, the food, and the drink station. It keeps the space feeling open, warm, and social instead of overly staged.

Music definitely helps set the tone, but you don’t need a fancy sound system to make it work. I’ve hosted plenty of parties using nothing more than the Pandora app playing through my TV, and it works just fine.
Games are another easy way to keep things fun and interactive if your group enjoys them.

There are endless ideas online, but my personal favorite for holiday gatherings is a simple dice game—it always gets people laughing and involved without much effort. Find the jumbo dice here.
As for the house itself, a little preparation goes a long way. I like to do a full clean about a week before the party, then just tidy and straighten things the day before so everything feels fresh without last-minute stress.
Small touches like a scented candle or potpourri in the bathrooms make a big difference, and I always make sure there’s plenty of toilet paper and clean hand towels available. The goal is a welcoming, comfortable space where guests feel taken care of, so you can relax and enjoy the party right along with them.
The Preparation
the more you can get done ahead of time, the less you’ll be running around like crazy
What You Can Do Ahead of Time
3 Months Out
- Decide on your food and cocktail menu
- Make your master shopping list
- Start buying liquor, mixers, nonperishables, and party supplies when you find good prices
- Check what serving pieces, glassware, bar tools, etc. you already have
👉 Find easy 2-ingredient cocktails at Best 2-Ingredient Cocktails for Beginners That Anyone Can Make
2 Months Out
- Prepare your guest list
- Purchase remaining liquor and shelf-stable mixers
- Buy wine, if appropriate for your party and storage allows
- Order specialty ingredients or decorations
- Stock up on napkins, plates, utensils, straws, etc.
1 Month Out
- Send party invitations
1 – 2 Weeks Out
- Send reminders the week of the party
- Finalize any recipes you’re still testing
Make Room to Mingle
Depending on your guest count, you may need to rearrange some furniture a day or two before the party. Push the dining table to the side and use it as your buffet table, then scatter the dining chairs around the living room for extra seating. The goal is to give everyone plenty of room to stand, mingle, and easily move between the bar and food tables without feeling crowded.
Setup Before Party Day
Depending on the size of your party, you may want to start setting up a week or two in advance. Trust me, the more you can get done ahead of time, the less you’ll be running around like crazy on party day!
For example, I host approximately 40 people for my annual holiday party, so there’s a fair amount to do. First, the house needs to get decorated for Christmas. Once that’s done, I pull out the buffet tables and start setting up my serving pieces. I actually arrange everything just as I plan to have it on the night of the party. This lets me see where I have gaps, where things might be too crowded, and whether I have enough room for all the food I’m planning to serve. It’s much easier to make those adjustments when I’m not trying to do it with guests walking through the front door!
Of course, I don’t leave everything sitting out for two weeks. I simply flip the serving pieces over or cover them with a clean kitchen towel to keep them dust-free and ready for party night.
If you’re hosting a smaller gathering of 15 people or less, you probably don’t need to start quite that early. Setting up your serving pieces and buffet area a day or two in advance should give you plenty of time.
You’ll be surprised at how much less stressful party day feels when you’ve already done the heavy lifting. And when your guests arrive and everything is ready to go, you’ll be very glad you did!
How to Arrange a Cocktail Party Buffet
Setting up a cocktail party buffet is one of my favorite parts of entertaining because it instantly sets the tone for the entire gathering. It doesn’t have to be complicated or overstyled—just thoughtful, organized, and easy for guests to navigate.
A well-planned setup keeps everything flowing, prevents bottlenecks, and lets you actually enjoy your own party instead of managing every detail.
One of the biggest things I’ve learned is that the bar or drink station should never be mixed in with the food or dessert table. It might seem convenient at first, but it almost always creates traffic jams and slows everything down.
Instead, I like to set up a separate bar area with everything guests need for cocktails, while keeping food and desserts on their own table. Once you separate the flow, the whole party feels smoother, more relaxed, and a lot more enjoyable for everyone—including you.

Simple Cocktail Party Buffet Layout
- Place plates at the beginning of the buffet.
- Arrange food from lighter items to heavier items.
- Put serving utensils with each dish.
- Keep napkins at both ends of the table.
- Use cake stands, risers, and overturned bowls to create height.
When I set up a cocktail party buffet, I think in terms of flow. The goal is to keep guests moving naturally without crowding one area or standing in each other’s way.
One of the biggest things I’ve learned is that if you’re not planning to personally mix drinks for your guests, a separate drink station is essential. It keeps traffic moving and prevents everyone from crowding around the food table while trying to pour cocktails at the same time.
At the drink station, I include everything needed for cocktails: glassware, ice bucket, spirits, mixers, garnishes, napkins, and a small trash or discard bowl for used limes or stirrers.

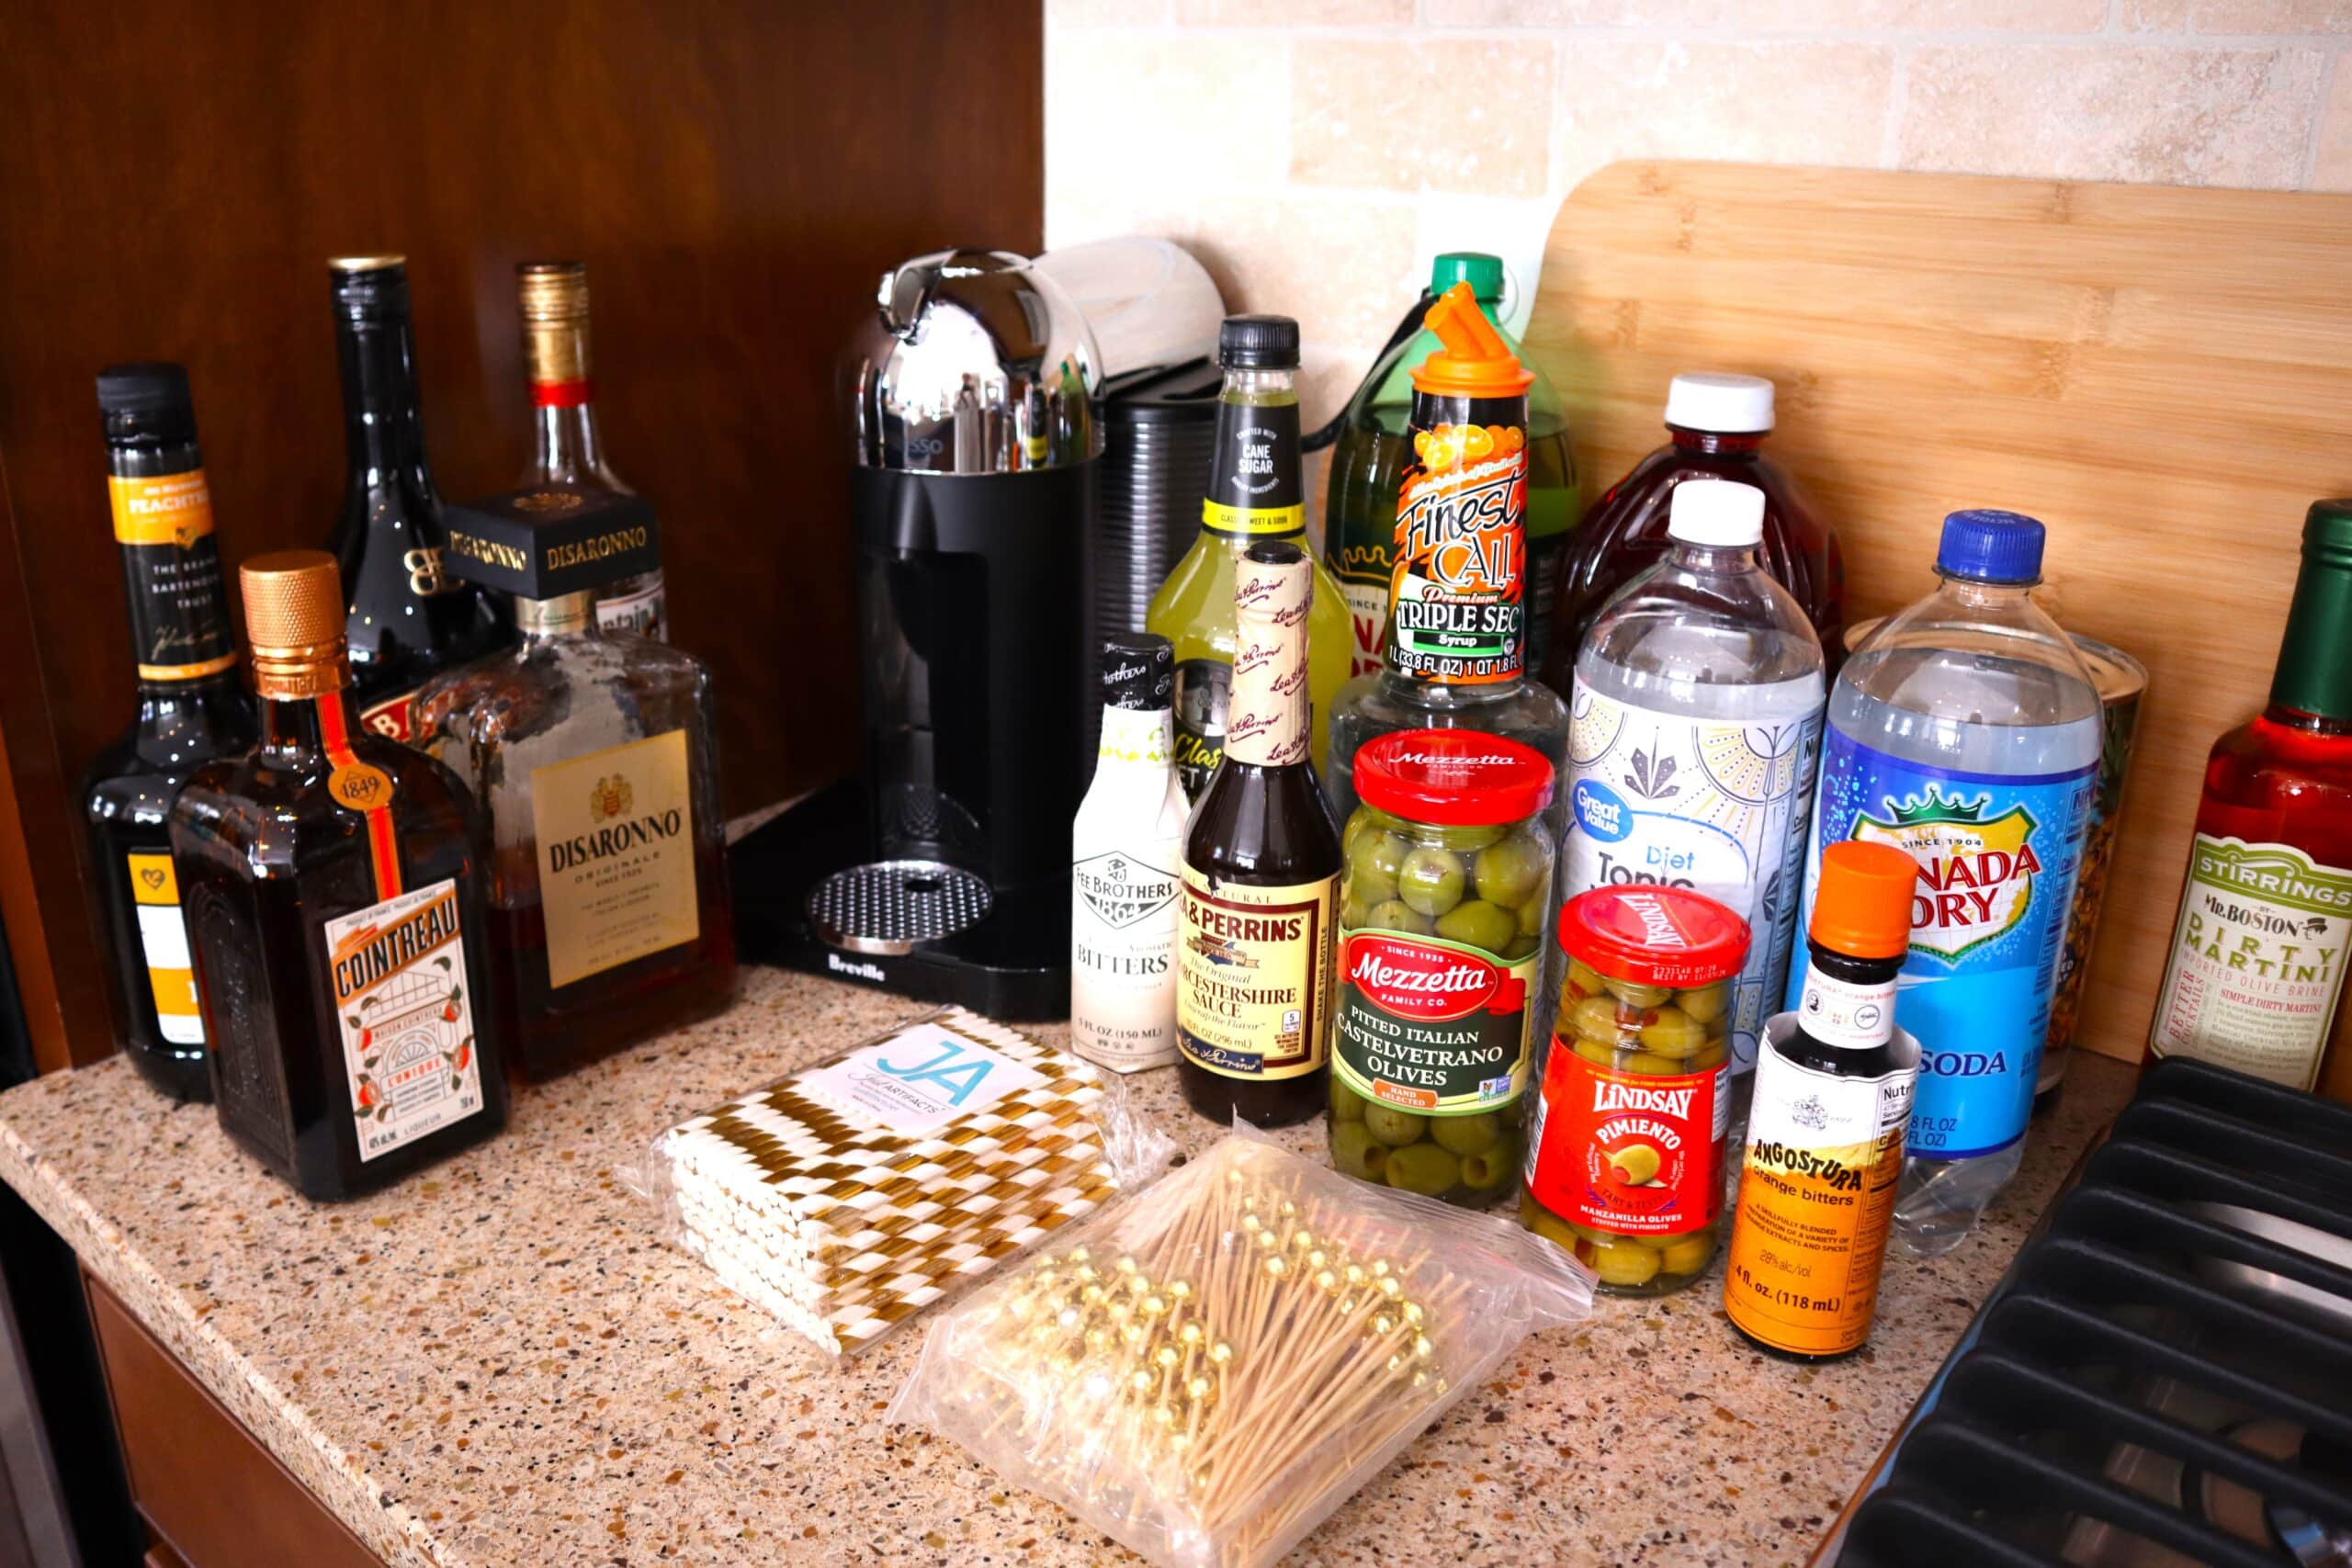
That said, I often choose to tend bar at my own parties because I genuinely enjoy it. It gives me a chance to talk with each guest throughout the night, and it naturally pulls people into the kitchen or bar area in a fun, social way. Whether you set up a self-serve station or take on bartender duty yourself, the key is keeping drinks in their own dedicated space so everything flows smoothly.
Next comes the food buffet tables, which I like to keep simple and easy to navigate. Appetizers are grouped together and arranged so guests can serve themselves quickly without hovering or waiting in line. I try to place plates at the beginning of the table and serving utensils with each dish so the flow stays smooth.
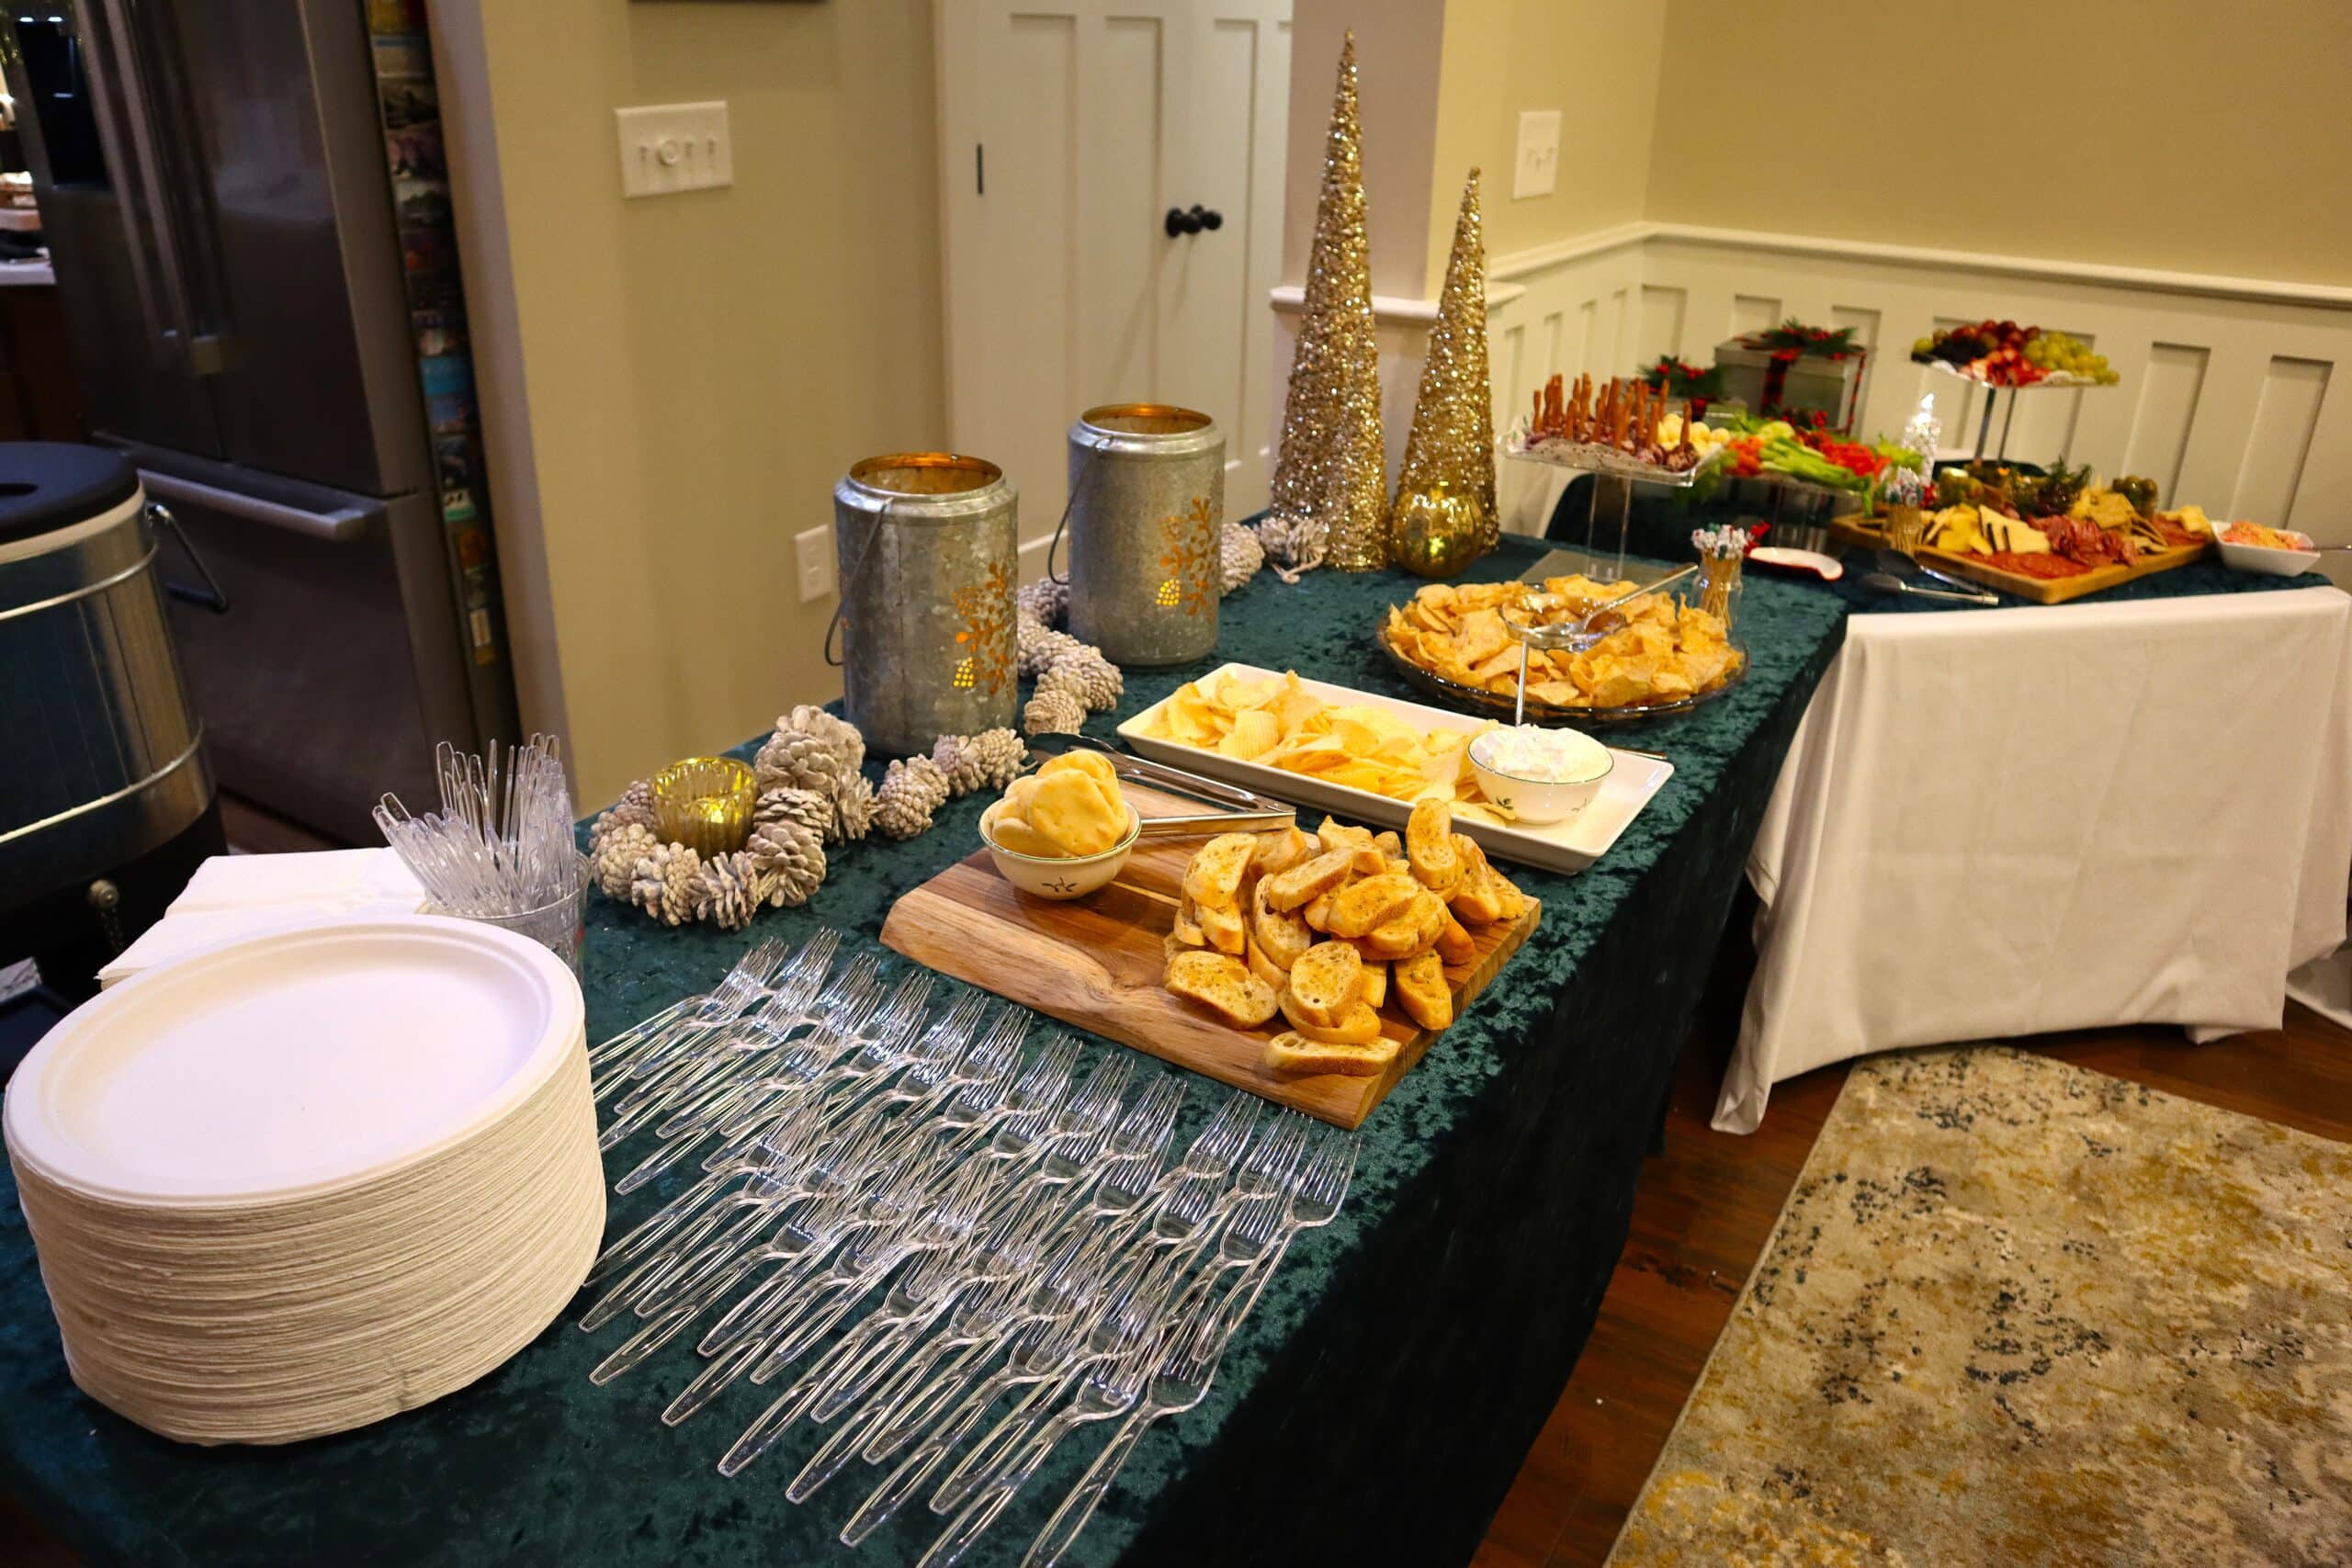
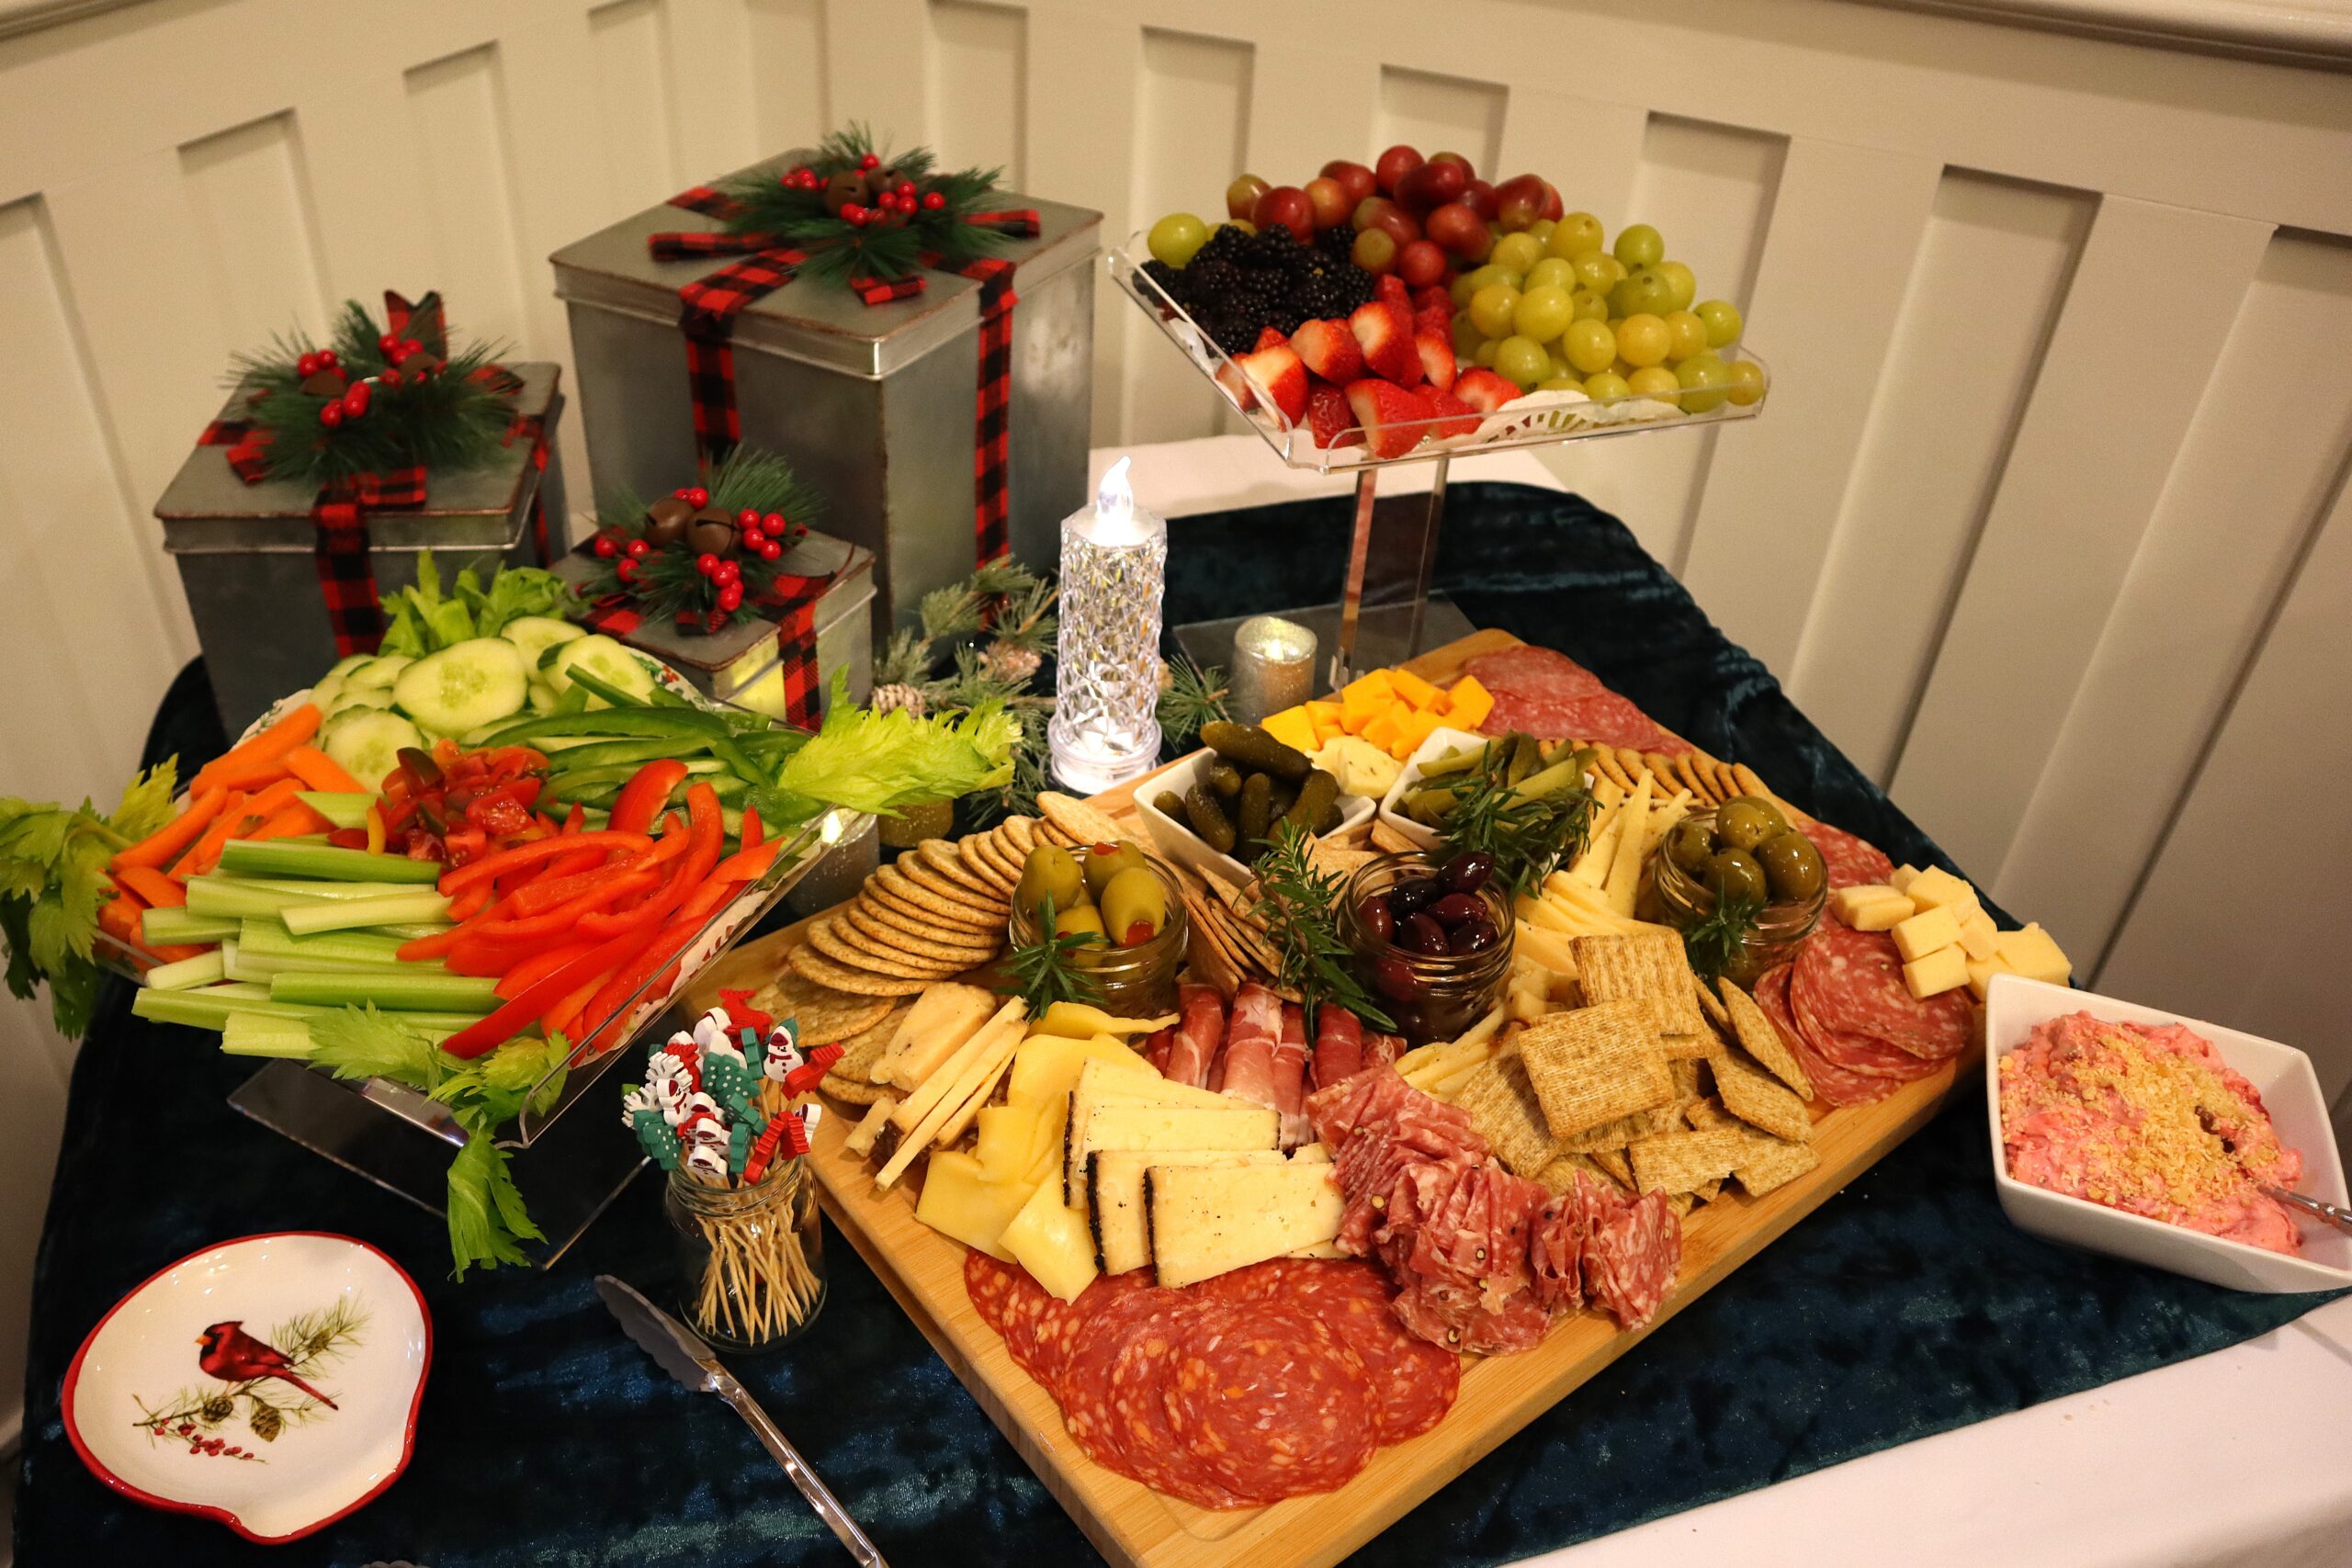
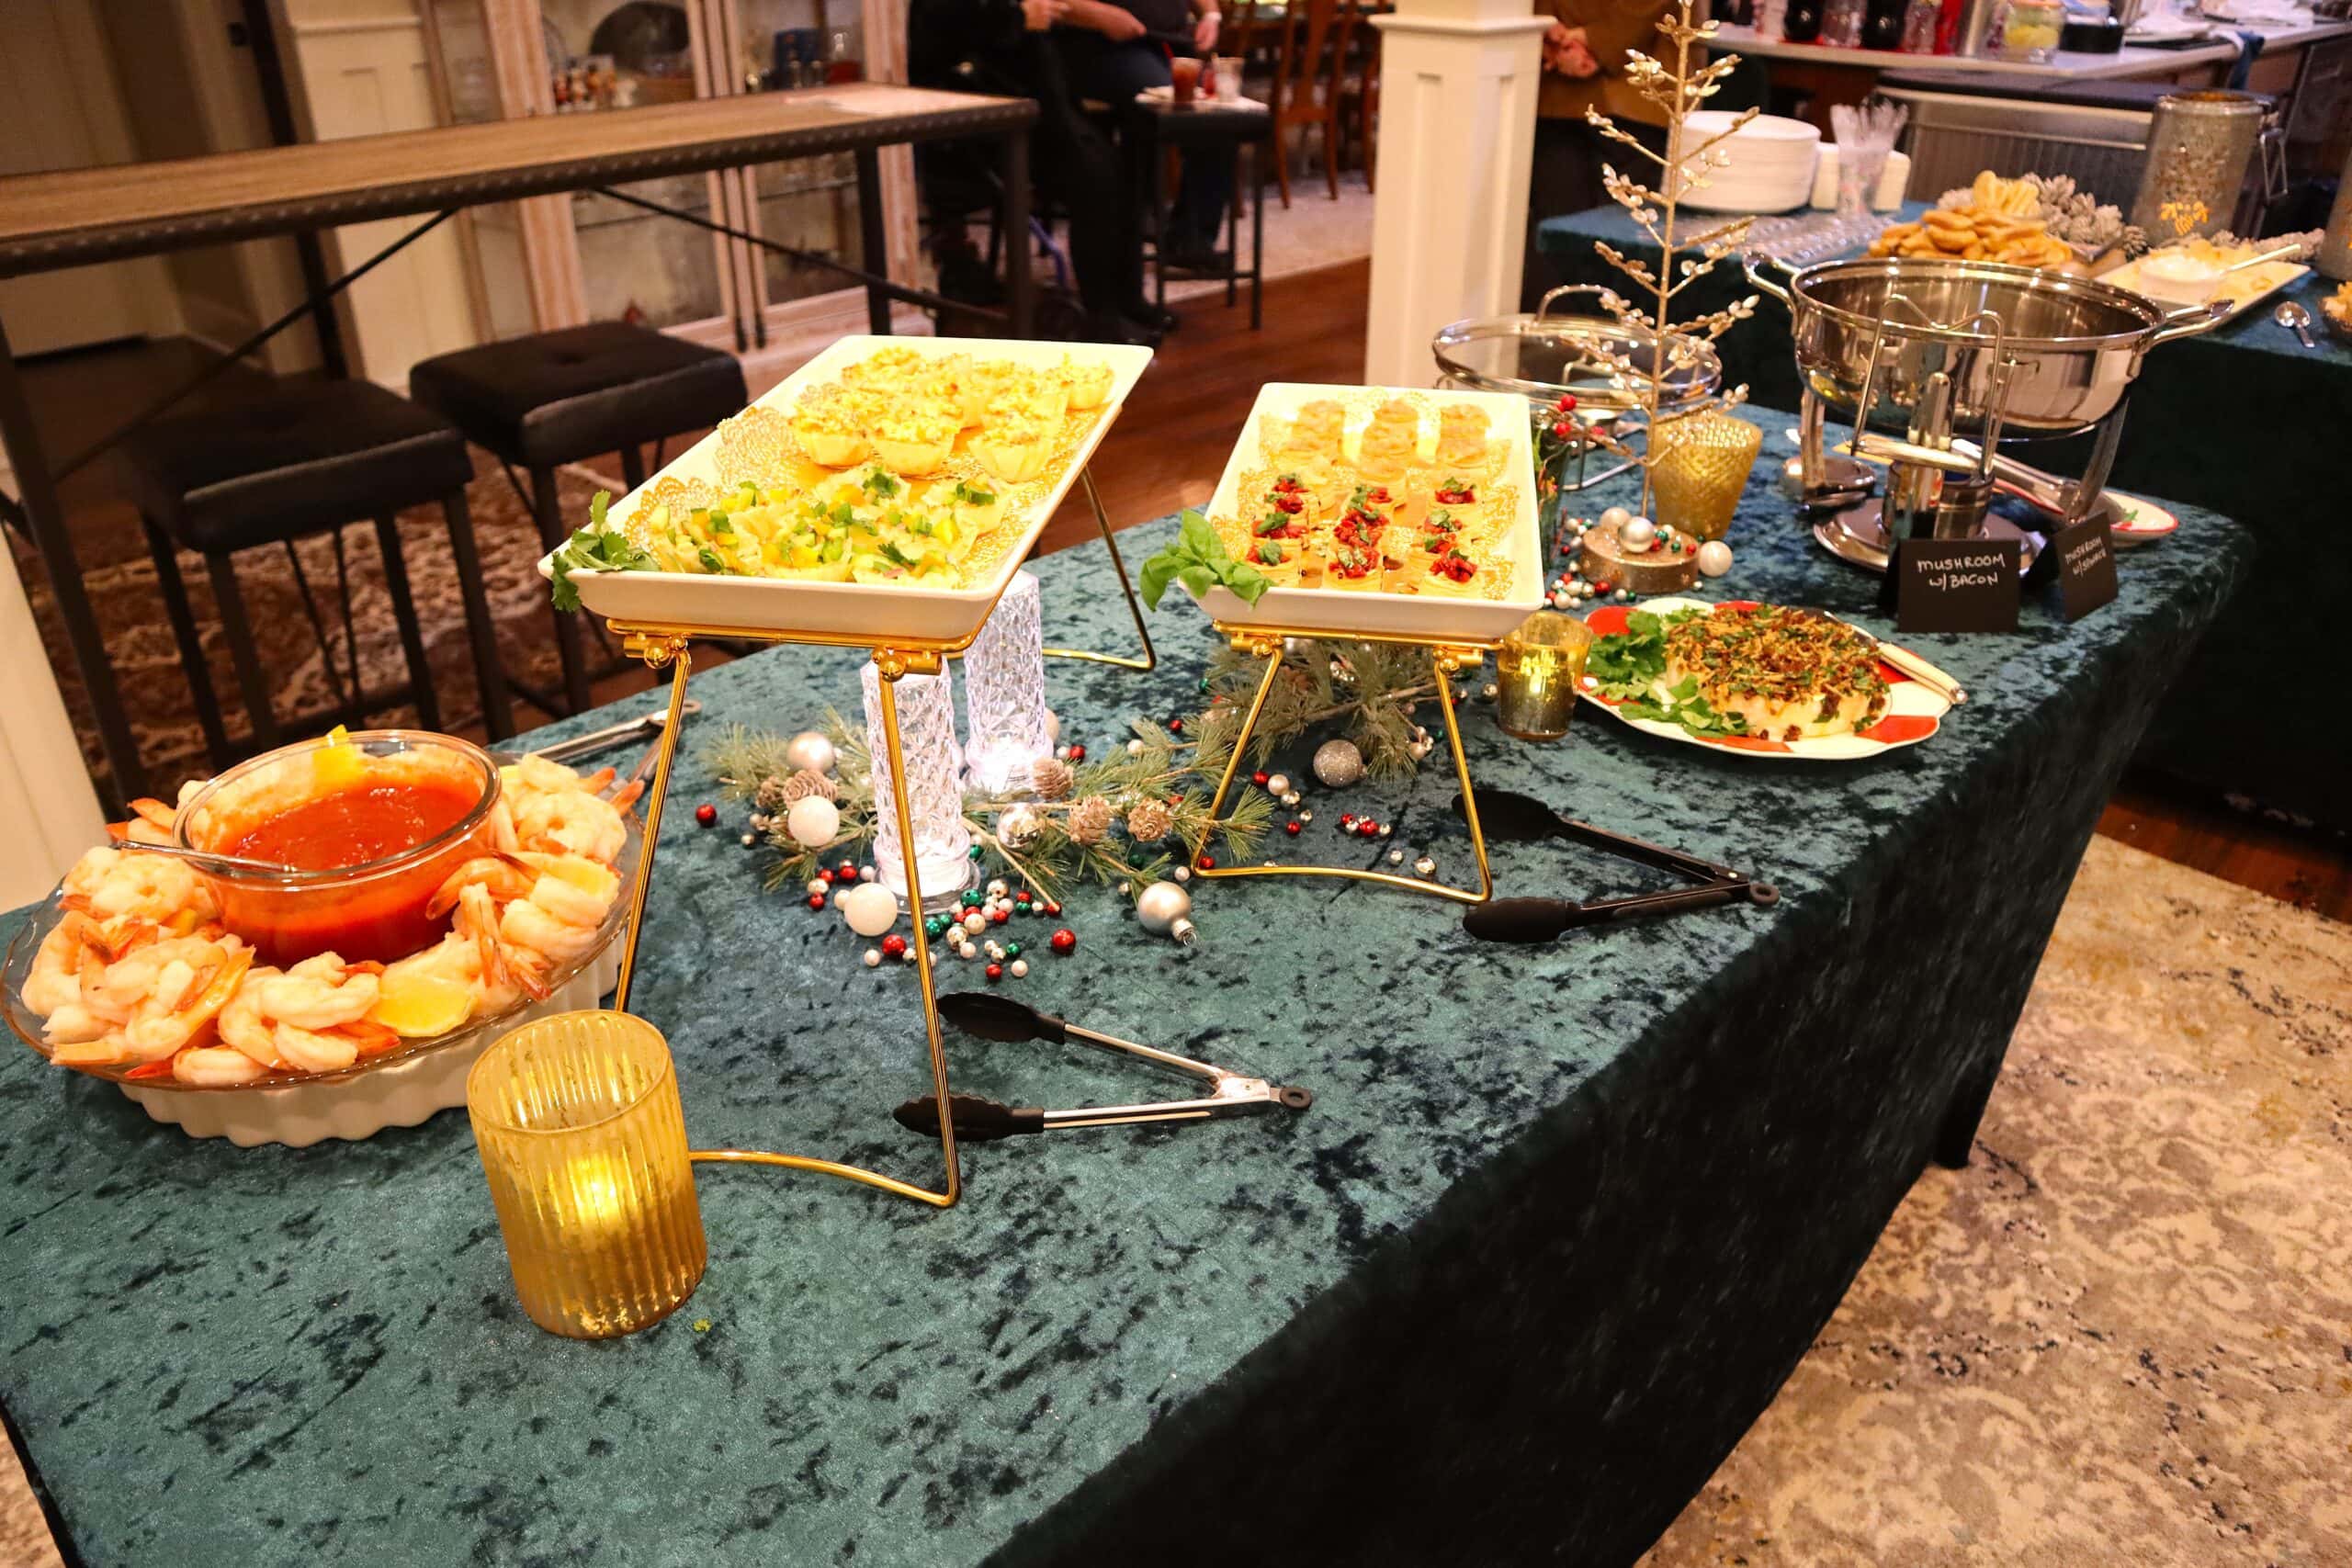
Finally, I set up a dessert or finishing area slightly away from the main food table if possible. This helps break things up visually and prevents the “all-in-one-stop” congestion that can slow a party down. Even a small amount of separation makes a big difference in how relaxed the space feels.


Once these three zones are in place—drinks, food, and dessert—the party naturally runs itself, and you get to enjoy the reason you hosted in the first place.
Tips for Smaller Spaces (You Don’t Need a Party Warehouse)
It took me years to accumulate the party essentials I have today—things like 6-foot folding tables, multiple serving platters, and enough glassware to handle just about any specialty cocktail. But before I had all of that, I made do with what I had, and honestly, those early parties still worked beautifully.
My party essentials collection has come a long way. This triple crock pot below? I had to borrow it!


One of my favorite tricks was turning my home office into the “food room.” I would cover my desk and credenza with tablecloths, and suddenly the space transformed into a surprisingly efficient buffet area with great flow. At other times, I used my dining table as the main food station, moved the chairs into the living room, and set out TV trays (or snack tables) so guests had easy places to sit and eat without crowding one spot.

And of course, no matter the setup, people naturally gravitate to the kitchen. I’ve learned to embrace it—guests with a plate in hand gathered around the kitchen bar is just part of the party. The goal isn’t a perfect setup; it’s creating enough space and flow so everyone can relax, help themselves, and feel comfortable wherever they land.
Setting Up the Bar
A little trick that makes cocktail parties easier: your cocktail bar will be happiest near the kitchen sink!
One thing many people don’t think about when setting up a party bar is having easy access to running water. I keep a plastic tub filled with hot, soapy water in the kitchen sink so I can quickly rinse the cocktail shaker between drinks, then let it drain upside down on a themed bar towel until it’s ready for the next cocktail. That’s why I always set my bar up as close to the kitchen sink as possible. If you’re serving just wine, though, place your wine glasses and wine tub wherever you have room—no running water necessary! :o)
My Favorite Cocktail Shaker for Parties
When you’re making cocktails for a party, a good cocktail shaker can make your life a whole lot easier. Whether you’re shaking up one drink for yourself or making cocktails for a crowd, a reliable shaker means no leaks, no struggling with stuck lids, and no guessing how much liquor you’re pouring. It’s one of those little bar tools that can make a big difference when you’re entertaining.
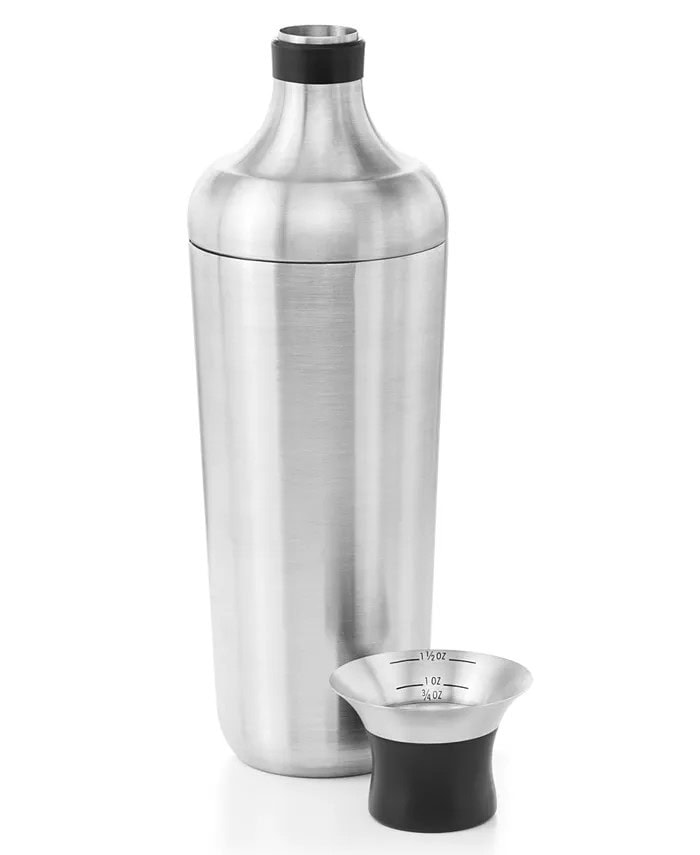
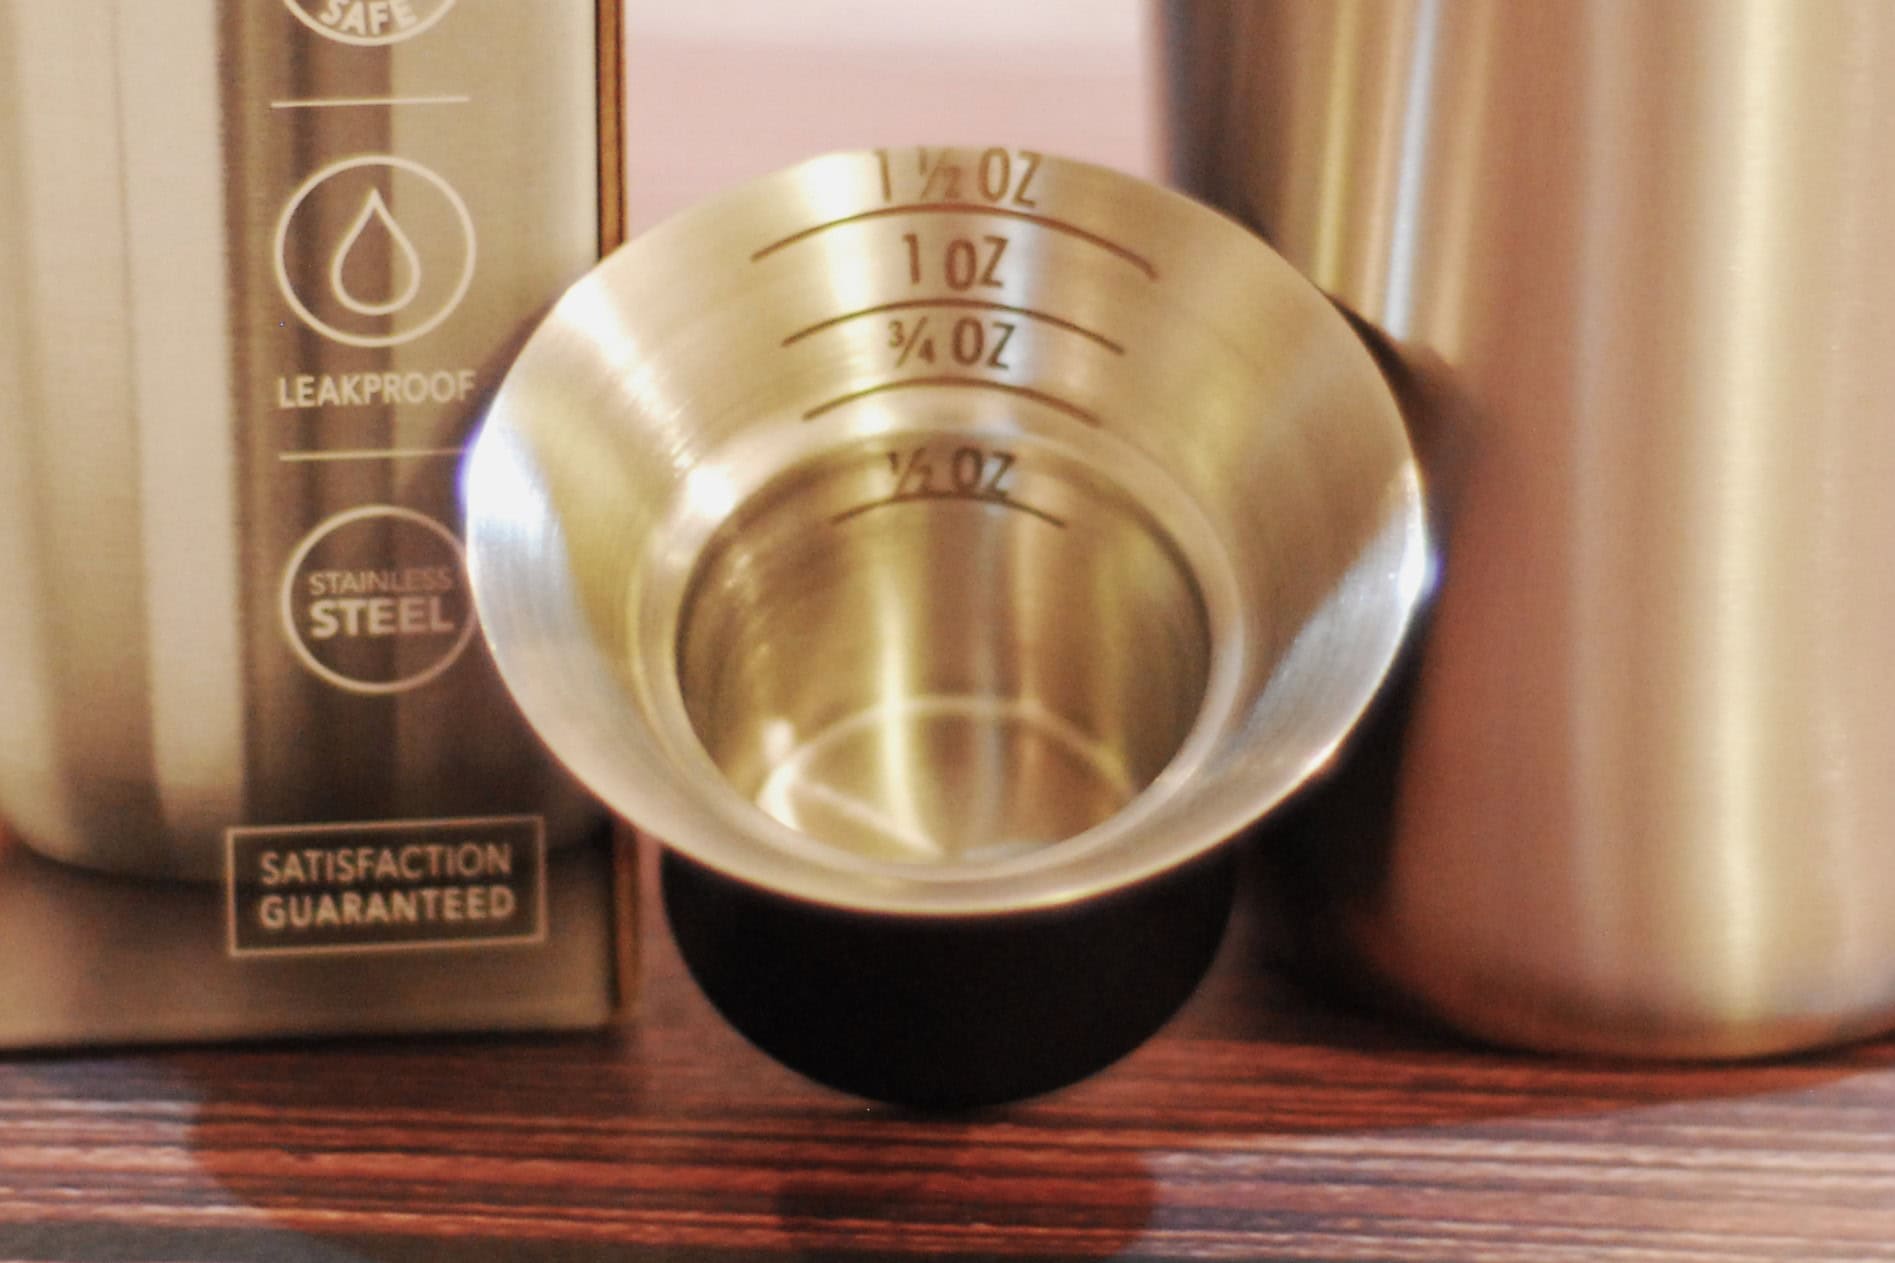
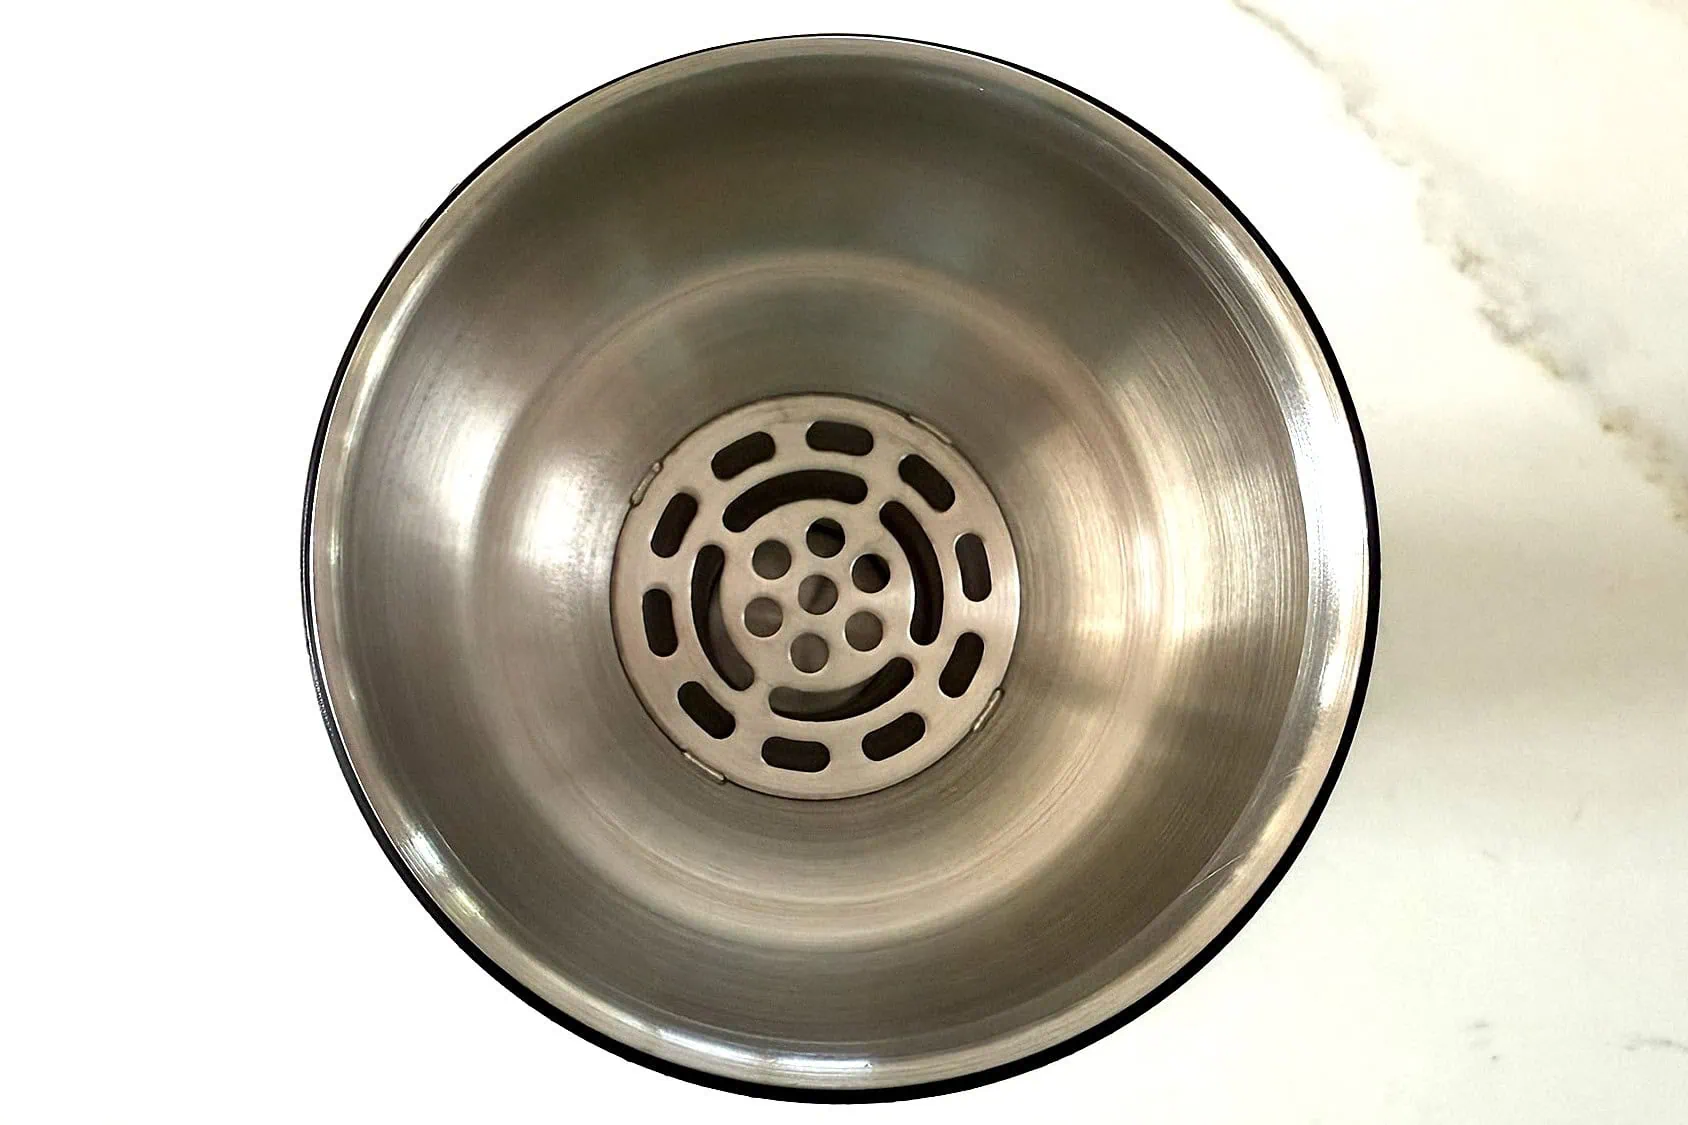
I have at least a dozen cocktail shakers, but this one is my favorite. It doesn’t leak, and you won’t have to bang the shaker against the sink to get the top off! Even better, the cap doubles as a measuring cup with clearly marked measurements from ½ to 1½ ounces, so you can measure the perfect amount every time. And when the party is over, just toss it in the dishwasher. Easy cleanup is always a win in my book!
Once you get the hang of shaking, you’ll feel like a total pro behind your own bar. And when you’re hosting a party, having the right tools makes mixing drinks faster, easier, and a whole lot more fun. So grab your shaker, give it a shake, shake, shake, and let the party begin!
The Ice Bucket Myth
Let’s talk about ice buckets. Those fancy little buckets look great sitting on the bar, all shiny and pretty, and they usually come with matching tongs. But honestly? In my opinion, they’re mostly good for looks.
The problem is, they never seem to hold enough ice, and those cute little matching tongs are designed to pick up about one ice cube at a time. If you’re drinking a cocktail that’s normally served over ice, you want to fill the glass with ice, not add one lonely cube at a time. Otherwise, your drink is going to get warm and watered down before you even get to the second sip.
And have you ever tried getting an ice scoop into one of those little ice buckets? Unless you have an extra-large ice bucket, it’s practically impossible. And let’s be honest, most of us don’t have an extra-large ice bucket sitting around the house.

For a party, I much prefer using a wine tub or a cooler. In fact, I have a cooler on wheels with three separate compartments, and it is my party drink workhorse. I use one section strictly for ice for cocktails, one for beer, and one for bottled water. Everything stays cold, there’s plenty of room, and guests can easily help themselves without crowding around the bar.


It may not be the prettiest thing sitting next to the bar, but it is far more practical. And if the cooler is bothering your party décor, dress it up! Add some fairy lights, a table skirt, or whatever fits your party theme. Pretty is nice, but when it comes to party ice, I’ll take practical over pretty every time.
Other notable items are a wine opener, bottle opener and carafe. I’ve tried a lot of containers over the years, but a leak-proof carafe makes batching cocktails so much easier.
Glassware Guide: Keep It Simple
Unless you’re hosting a themed party—like a Tiki party or Halloween party—you really don’t need a cabinet full of different types of glassware. For most cocktail parties, there are just a few basic glasses that will cover almost everything you’re serving.
Rocks glasses are the workhorses of the bar. They hold approximately 8 – 10 ounces and are perfect for cocktails and mixed drinks served over ice, such as Margaritas, Rum & Coke, and a Bourbon Old Fashioned. You’ll need at least 2 glasses per guest.
Highball glasses hold approximately 12 – 16 ounces and are great for taller drinks. They’re perfect for non-alcoholic drinks like soda and water, as well as cocktails such as a Tequila Sunrise or a Bloody Mary loaded with garnishes. They’re also handy for serving beer.

If you’re serving wine, you’ll want wine glasses, of course. And if you’re serving martinis (my favorite!), martini glasses are a must. There’s just something about sipping a Martini from a proper Martini glass that makes it feel like a party!

The good news is you don’t need a different glass for every cocktail. Choose versatile glassware that works with the drinks you actually serve, and save the specialty glasses for those occasions when they really add to the fun. And when you’re hosting a themed party, that’s when you can have a little more fun with your glassware!
Cocktail Party Essentials Worth Investing In
This post may contain affiliate links. We earn a small commission if you buy the products from these links (at no extra cost). As an Associate, I earn from qualifying purchases. But we only recommend products we would use ourselves. For more information, click here to see our disclosures.
You don’t need a house full of entertaining supplies, but a few basics will make hosting easier:
Bar Essentials Worth Having
Start With the Basics: After years of hosting, these are the bar essentials I recommend having on hand to get your cocktail party started.
- Cocktail Shaker (Includes a measuring cap and built in strainer)
- Rocks Glasses – 12 Pack
- Rocks & Highball Glass Set – 16 Pack
- Wine Glasses – 12 Pack
- Wine Opener
- Bottle Opener
- Ice Scoop
- Large Ice Bucket
- Cocktail Napkins – Plan on at least 3 times your guest count. Match your theme!
Add as You Go: As your bar grows, consider adding these helpful extras when your budget allows. There’s no need to buy everything at once.
- Martini Glasses
- Leak Proof Carafe (Pre-made cocktails)
- Citrus Juicer
- Citrus Squeezer
- Bar Salt & Sugar Rimmer
- Muddler
- Highball Glasses – 12 Pack
- Condiment Caddy
- Bar Mat
- Wine Tub
- Large Cooler
Serving Pieces
- Large platters
- Charcuterie board
- Small bowls for dipping sauces
- Serving utensils
- Tongs so guests don’t have to use their hands for chips and other finger foods
- Serving spoons for dips and sauces
- Cake stand or riser for height
Have more tongs than you think you’ll need. I learned that guests don’t want to use their hands to grab food from a serving platter when there’s a perfectly good pair of tongs sitting nearby!
Table & Guest Basics
You don’t need fancy tableware to host a great party. I use a combination of real and disposable items, and quality paper plates and plastic cups can work beautifully. The key is having enough for everyone—and then some.
My rule of thumb: For most disposable items, I plan for more than one per guest. It’s much better to have extras than to run out halfway through the party.
- Napkins – Plan on at least 3 times your guest count. Guests use more napkins than you think!
- Dinner plates – Plan on 2 times your guest count. If using paper plates, choose sturdy, good-quality ones that won’t fold under the food.
- Dessert plates – Plan on 2 times your guest count if you’re serving dessert on separate plates.
- Silverware – Plan on 3 times your guest count for forks and 2 times your guest count for knives and spoons. If using plastic, spend a little more for sturdy, good-quality utensils that won’t bend or break.
- Plastic cups for soda – Yes, I use plastic cups! There’s no need to use your good glassware for every drink.
- Straws – Keep plenty on hand for soft drinks and other beverages.
- Trash bag liners – Have extra liners ready so you can quickly swap a full bag during the party.
- Cocktail straws – Perfect for mixed drinks and cocktails served over ice.
- Cocktail fruit picks – Handy for garnishes and appetizers.
The Final Countdown
you’re getting close!
Two Days Before
Two days before the party is a great time to do a final review of both your Food & Drink and To-Do lists. Add anything you may have forgotten, remove anything you no longer need, and take a moment to make sure you’re still on track.
Time to shop for the fresh stuff:
- Fruit and fresh herbs for garnishes – Save these for the last couple of days so they look and taste their best.
- Cheese, vegetables, fruit, and dairy – These are best purchased closer to the party so they’re fresh and ready to serve.
Finish the cleaning. Get those last rooms, floors, bathrooms, and other areas checked off your list. You don’t want to be worrying about cleaning when you should be enjoying your guests!
Set up your buffet, if you haven’t already. Put out your serving dishes and arrange everything so you know exactly where your food will go. If you’ve already done your practice setup, even better—you can simply give everything a quick check and make any final adjustments.
At this point, your goal is to get the big stuff out of the way. The closer you get to party time, the more you should be checking things off—not adding to your workload!
One Day Before
The big day is almost here! Today is all about getting as much done ahead of time as possible so you’re not stuck in the kitchen or behind the bar when your guests arrive.
Prepare appetizers that can be made in advance. Anything that holds well overnight should be checked off your list today. Just be sure to store everything properly so it’s fresh and ready to serve.
Mix your batch cocktails, if you’re planning to serve any. Batch cocktails are one of my favorite party tricks because they make serving drinks so much easier. Depending on the recipe, you may want to hold off on adding ice, sparkling ingredients, or other things that could affect the flavor or texture until closer to serving time.
Prep your fresh citrus juice. Don’t wait until party time to squeeze lemons and limes for every cocktail. I squeeze the juice the night before using a citrus squeezer over a bowl, then store it in a small bottle in the refrigerator. Trust me, you’ll be glad you aren’t squeezing citrus every time someone asks for a cocktail!
Don’t forget to chill the wine! If you’re serving white wine and/or Prosecco, get it into the refrigerator the day before. There’s nothing worse than realizing at party time that your wine isn’t cold!
Set up your bar. Put out the glasses, cocktail shaker and tools, napkins, mixers, and anything else you’ll need. If you’re serving multiple cocktails, this is also a good time to make sure you have everything you need for each one.
Buy your ice, but only if you have a place to store it. If you don’t have enough freezer space, don’t worry about it—just add ice to your party-day list and pick it up the day of the party. There’s nothing worse than buying a mountain of ice too early only to discover you have nowhere to put it!
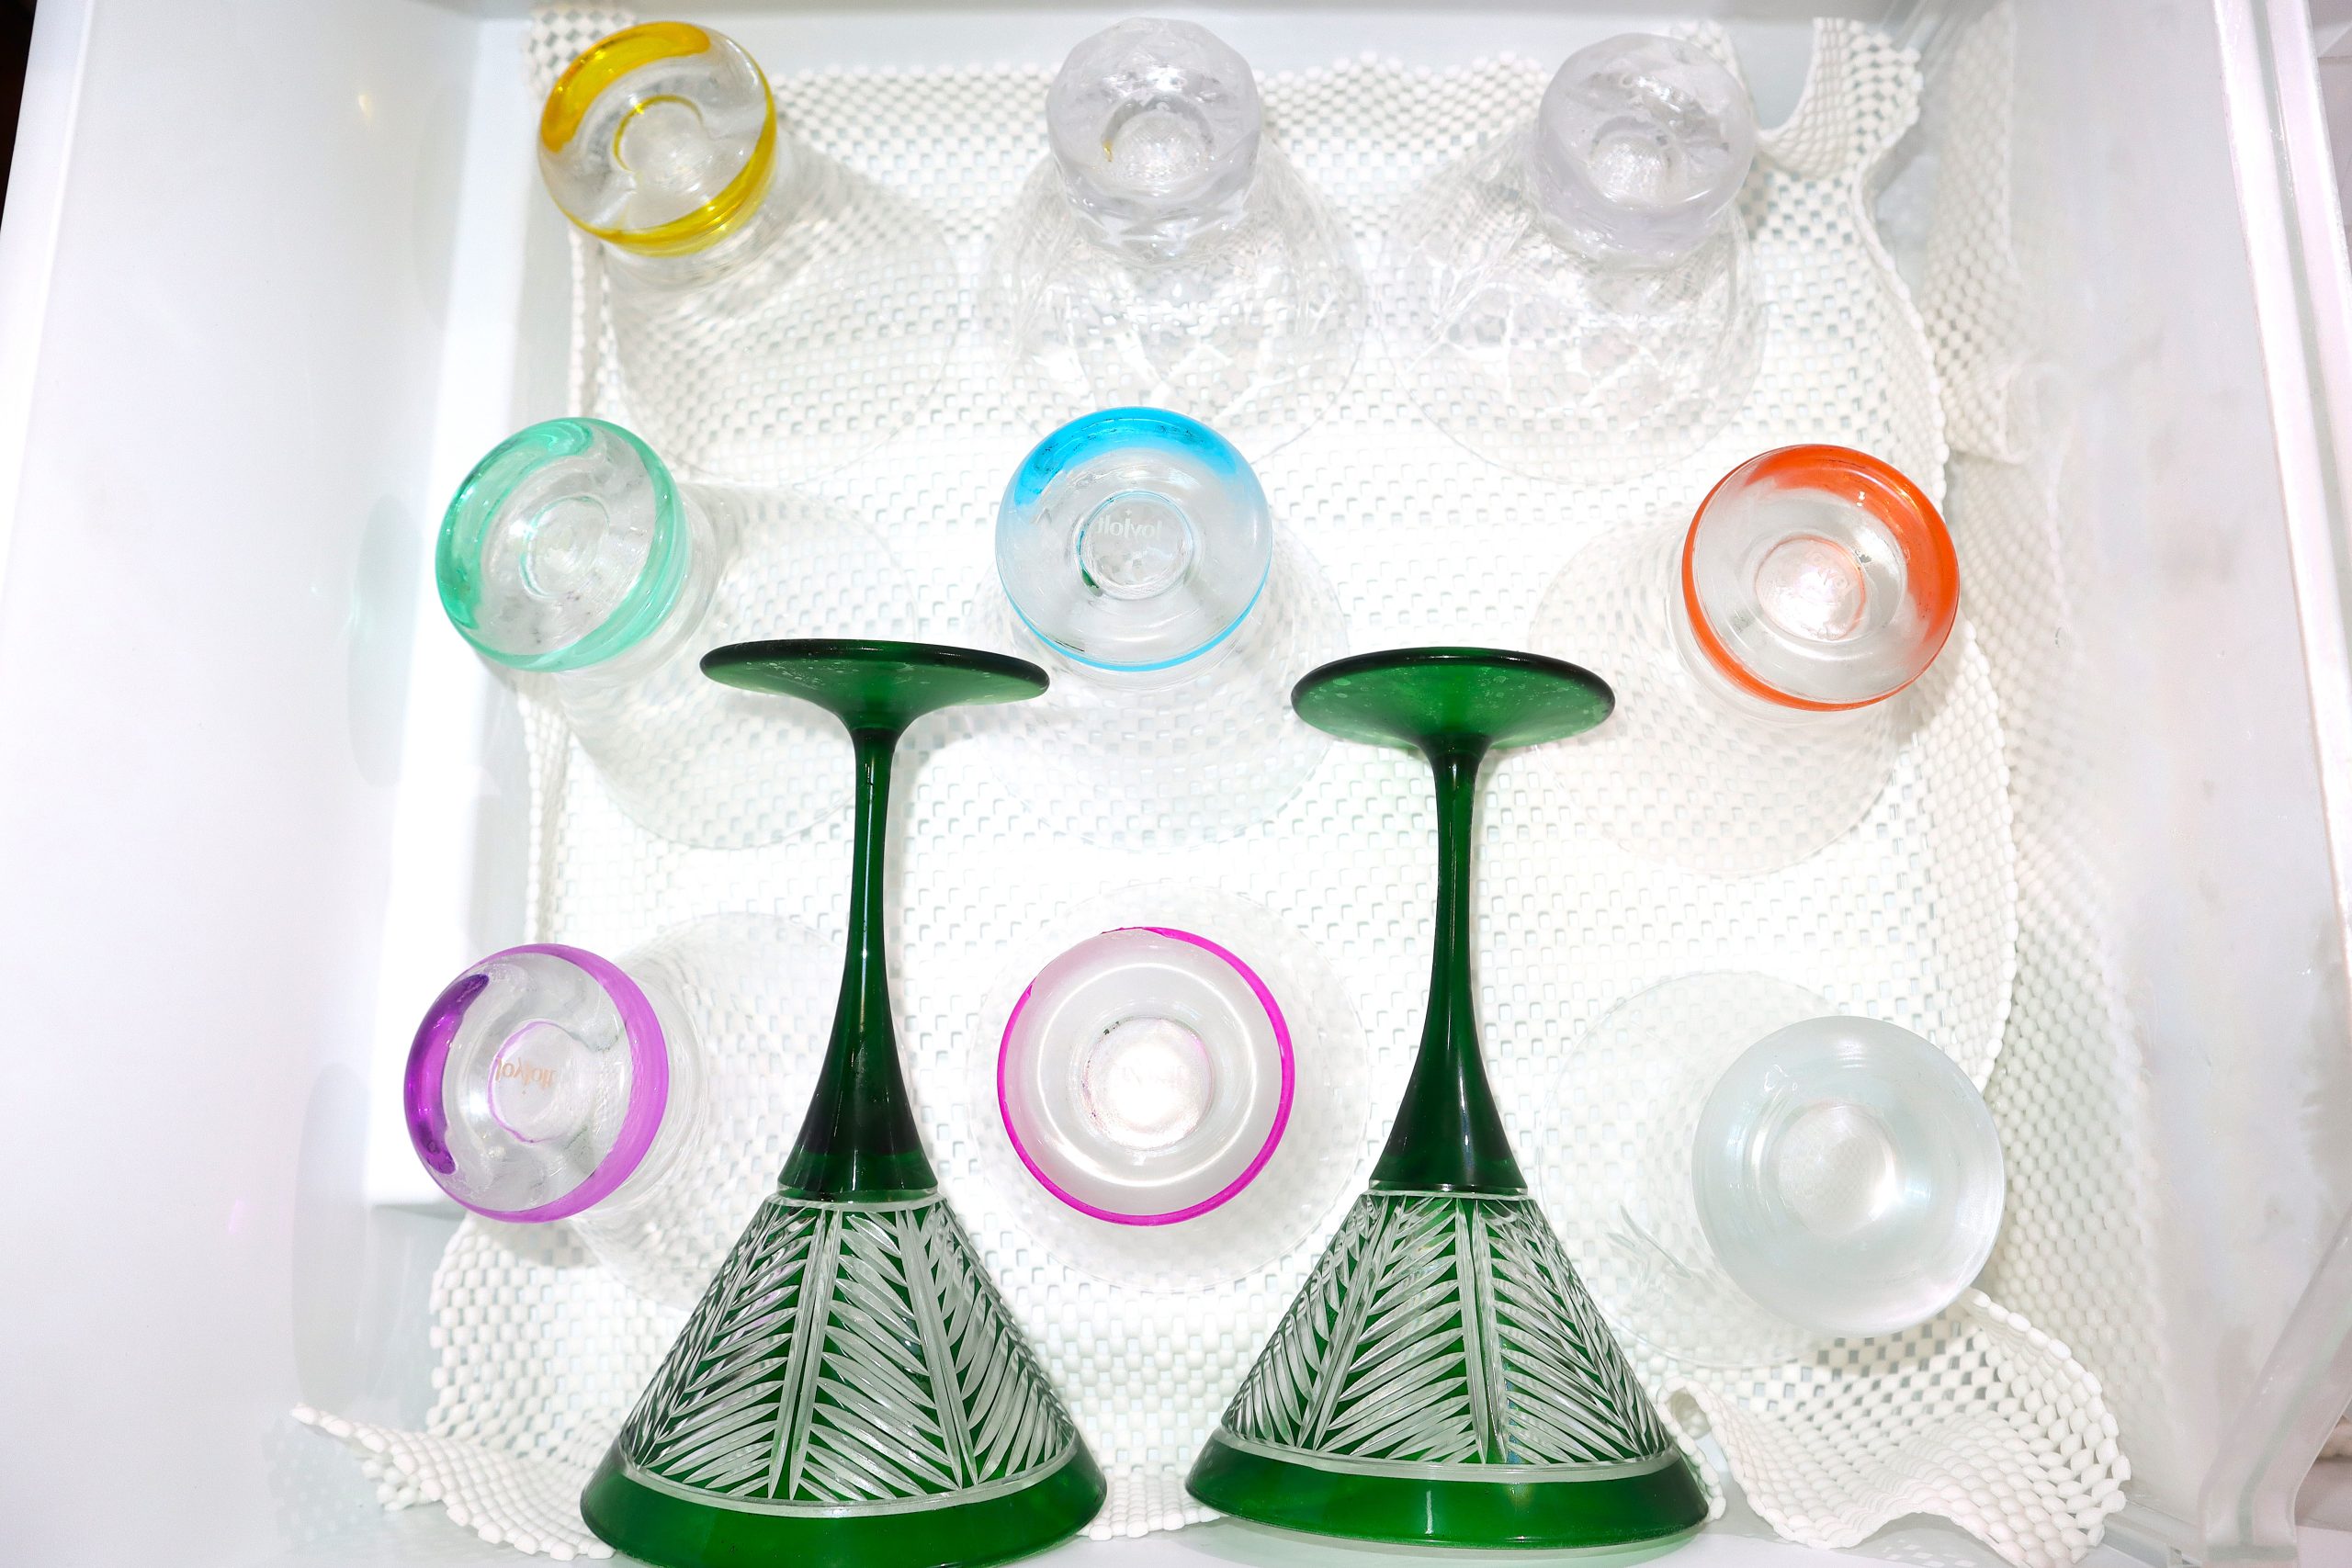
Serving martinis? Chilling your glasses in the freezer is a must! Nobody wants a perfectly shaken martini poured into a warm glass. If you have the freezer space, tuck your martini glasses in the night before. I like to place mine in the ice bucket, cushioned with a piece of shelf liner so they don’t slip or scratch. They’ll be frosty and ready to go when cocktail time rolls around—and that’s one less thing on your party-day to-do list!
By the end of today, you should be feeling pretty good. Tomorrow is party day, and your goal is to enjoy it—not spend the entire day getting ready!
Party Day
It’s finally here! 🎉 Today is all about the finishing touches. If you’ve followed your lists and done the prep work ahead of time, you should be able to enjoy the day instead of spending it running around getting everything ready.
Pick up any last-minute store-bought items and the ice. This is also the time to grab anything you may have decided to purchase fresh that morning.
Prepare your cocktail garnishes. Slice the fruit, prep the herbs, and get everything ready to make your cocktails look as good as they taste. Having your garnishes ready to go makes cocktail service so much easier once guests arrive.
Fill your ice buckets and coolers. Get your drinks chilled and your ice where you need it. If you’re serving beer, wine, bottled water, or other cold drinks, this is the perfect time to get everything nice and cold.
Open only what you need. I open one bottle each of red wine, white wine, and Prosecco before guests arrive so they’re ready to serve—opening bottles when everyone is arriving can slow things down. I leave liquor and mixers unopened until they’re needed. That way, anything you don’t use can go back in the cabinet or refrigerator and be saved for your next party.
Set the mood with lighting. Adjust the lights around the house so everything feels warm and inviting, but not too dark. Turn on your battery-operated candles, fairy lights, and any holiday decorations that add a little sparkle. This is one of those small details that makes a big difference—and it instantly lets you know the party is officially underway!
Turn on the music. 🎶 Don’t wait until the doorbell rings! Put on your party playlist and let the house start feeling festive.
Then take a breath, grab yourself a drink, and enjoy your party. You’ve done the work—now it’s time to have some fun!
Final Sip
The secret to successful entertaining isn’t perfection. It’s creating an environment where friends and family can relax, connect, and make memories together. A simple signature cocktail, a few delicious appetizers, and a welcoming atmosphere are often all you need. Start small, keep it simple, and remember that your guests came to spend time with you—not inspect every detail of the party.
Cheers to gathering, laughing, and making every happy hour feel a little more special!